Designing Layouts
Layout is the way learners see your lab, it’s the actual view of the way they are going to see and work with the content. A clear layout helps learners follow steps, practice tasks, and view results without unnecessary switching between windows. Layouts control how instructions, terminals, and services are arranged on the screen.
Creating a layout
Section titled “Creating a layout”All labs are created with a default layout, which provides a starting point for the lab. A default layout contains one panel.
Layout names can use lowercase letters, numbers, hyphens, and underscores. They must:
- Begin and end with a letter or number
- Not contain consecutive hyphens or underscores
- Be unique (no duplicates allowed)
Example of allowed and disallowed slugs:
- ✅
layout_1,two_rows,three-columns - ❌
-layout,layout2$,33%-columns
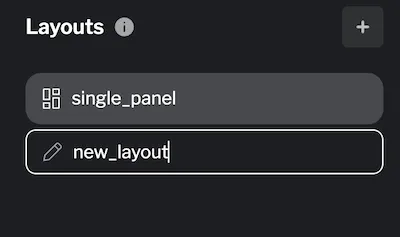
To create a new layout, click the + button in the Layouts tab, give it a name and “press Enter ↵”:
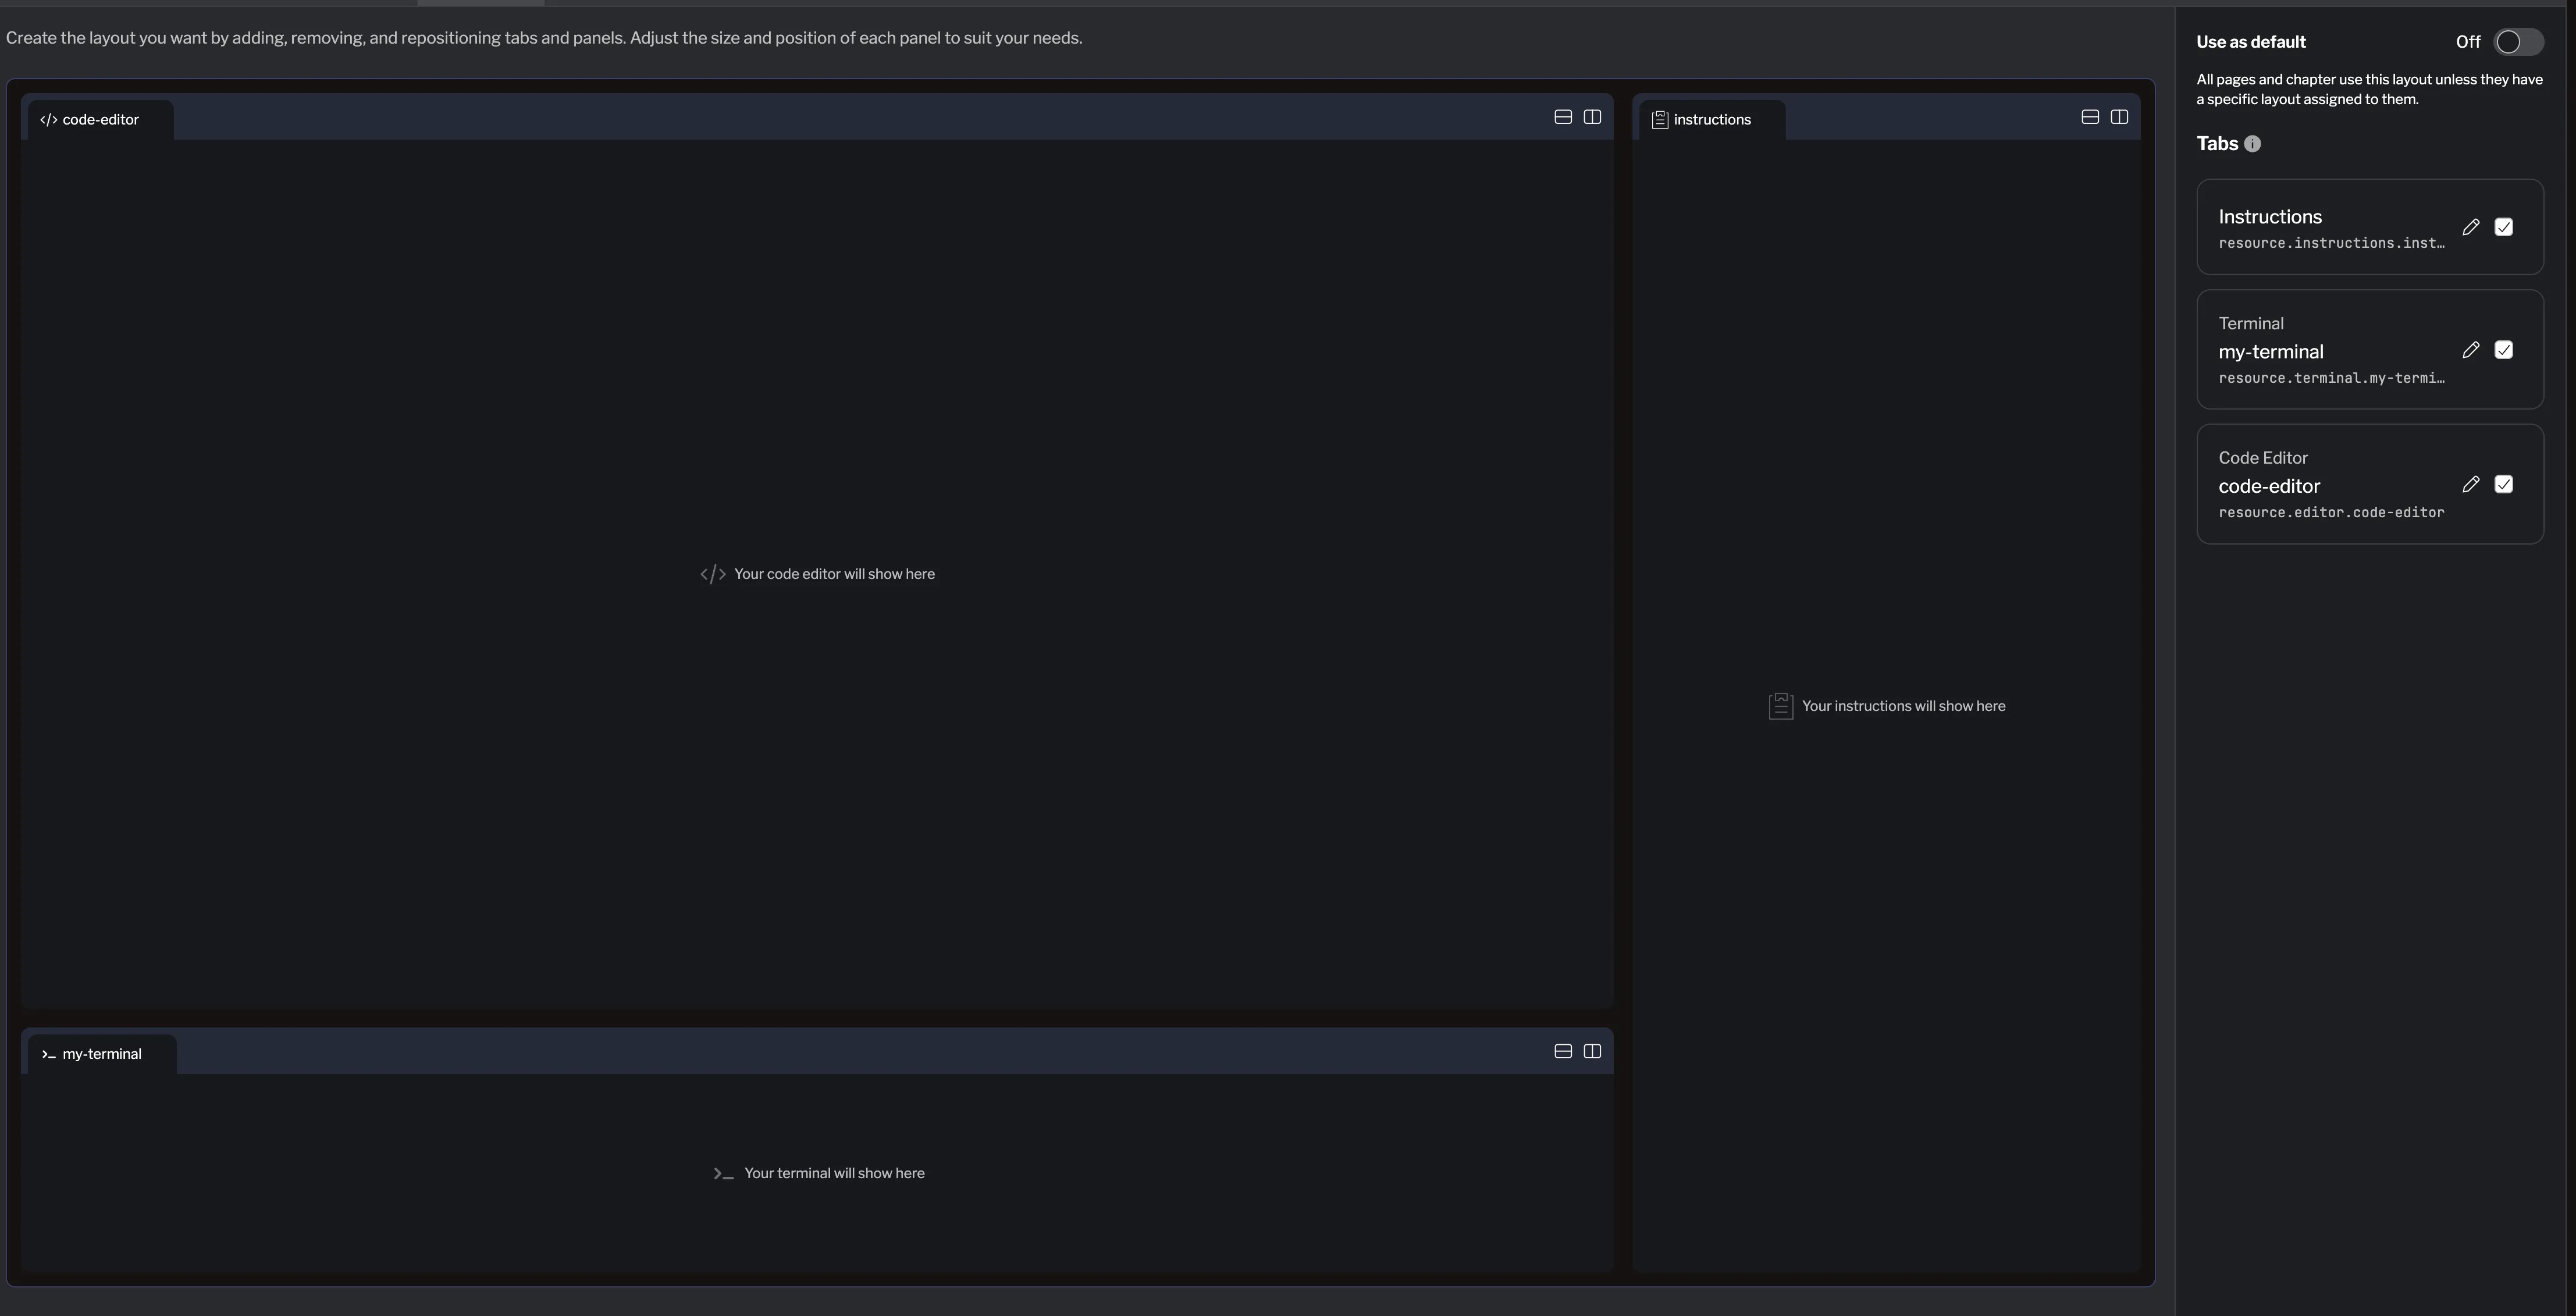
Before diving into the details, here’s an overview of the layout editor:
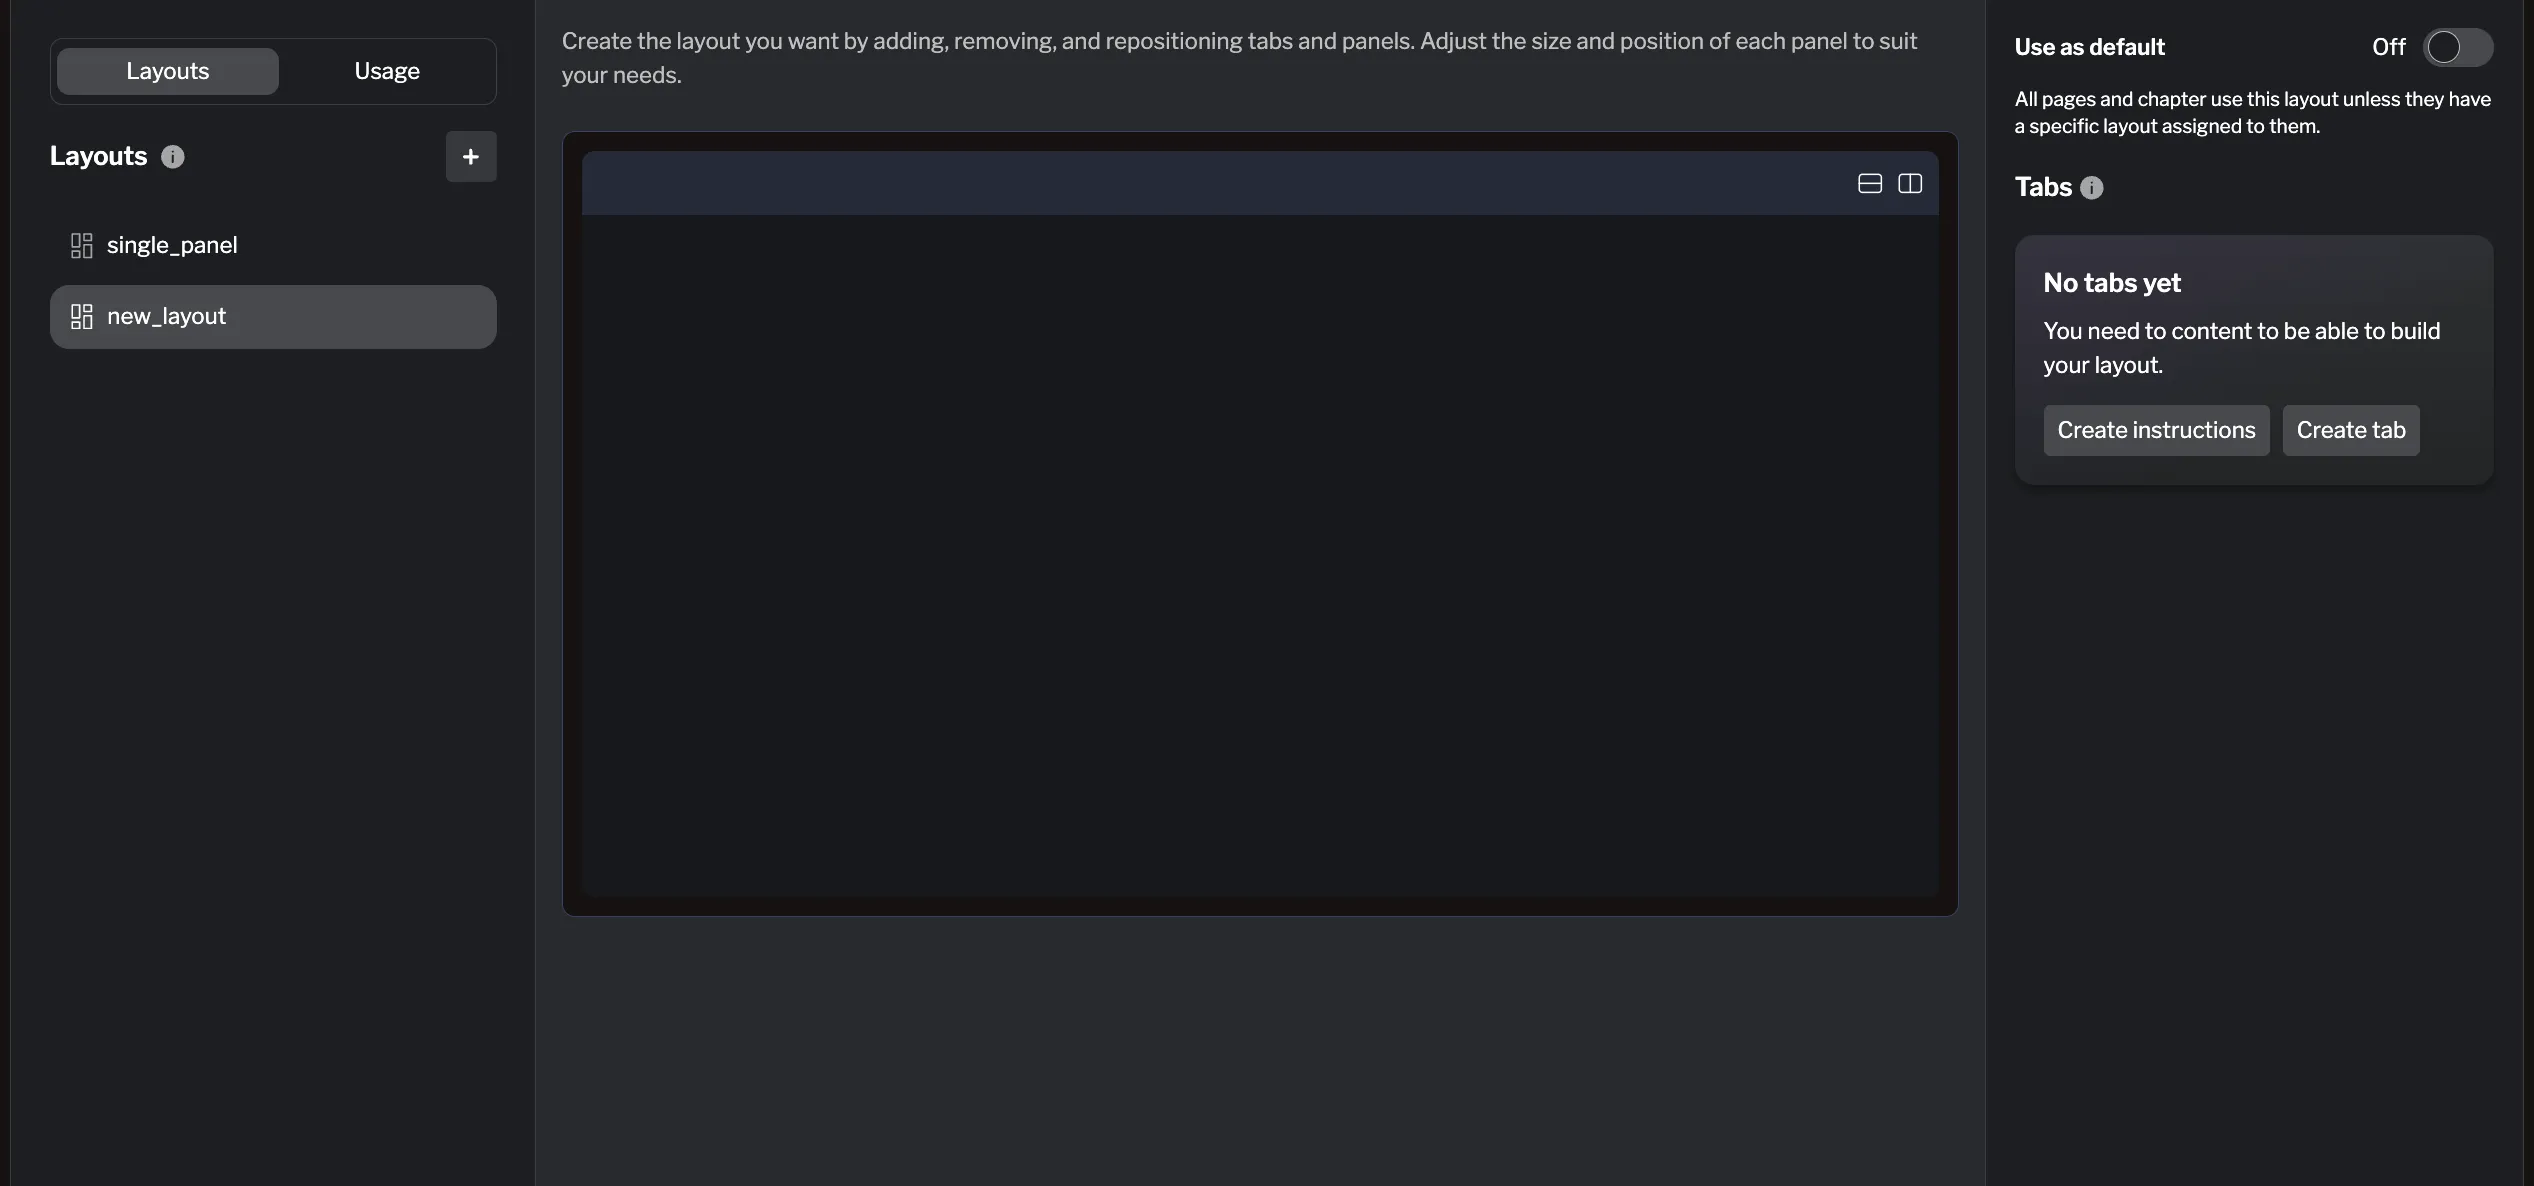
- The left sidebar on the left lets you switch between layouts and assign layouts to the content.
- The main area shows the way the layouts will be shown to the learner. You can modify it by adding panels and tabs in the right side bar.
- The right sidebar lists available tabs that can be added to the layout.
Modifying a layout
Section titled “Modifying a layout”The default layout has a blank canvas containing a single panel. From there, you can split panels and add elements such as instructions, terminals, notes, or an editor.
Renaming a layout
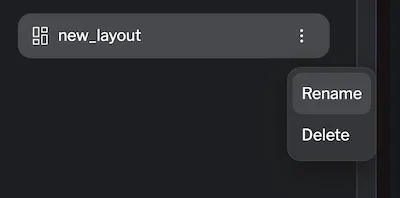
Section titled “Renaming a layout”You can rename any layout using the ... menu next to the layout name in the layouts list.
Deleting a layout
Section titled “Deleting a layout”To delete a layout, use the same ... menu next to the layout name in the layouts list and select “Delete.” Confirm the deletion when prompted. Remember, you cannot delete the last remaining layout or the current default layout.
Adding and merging panels
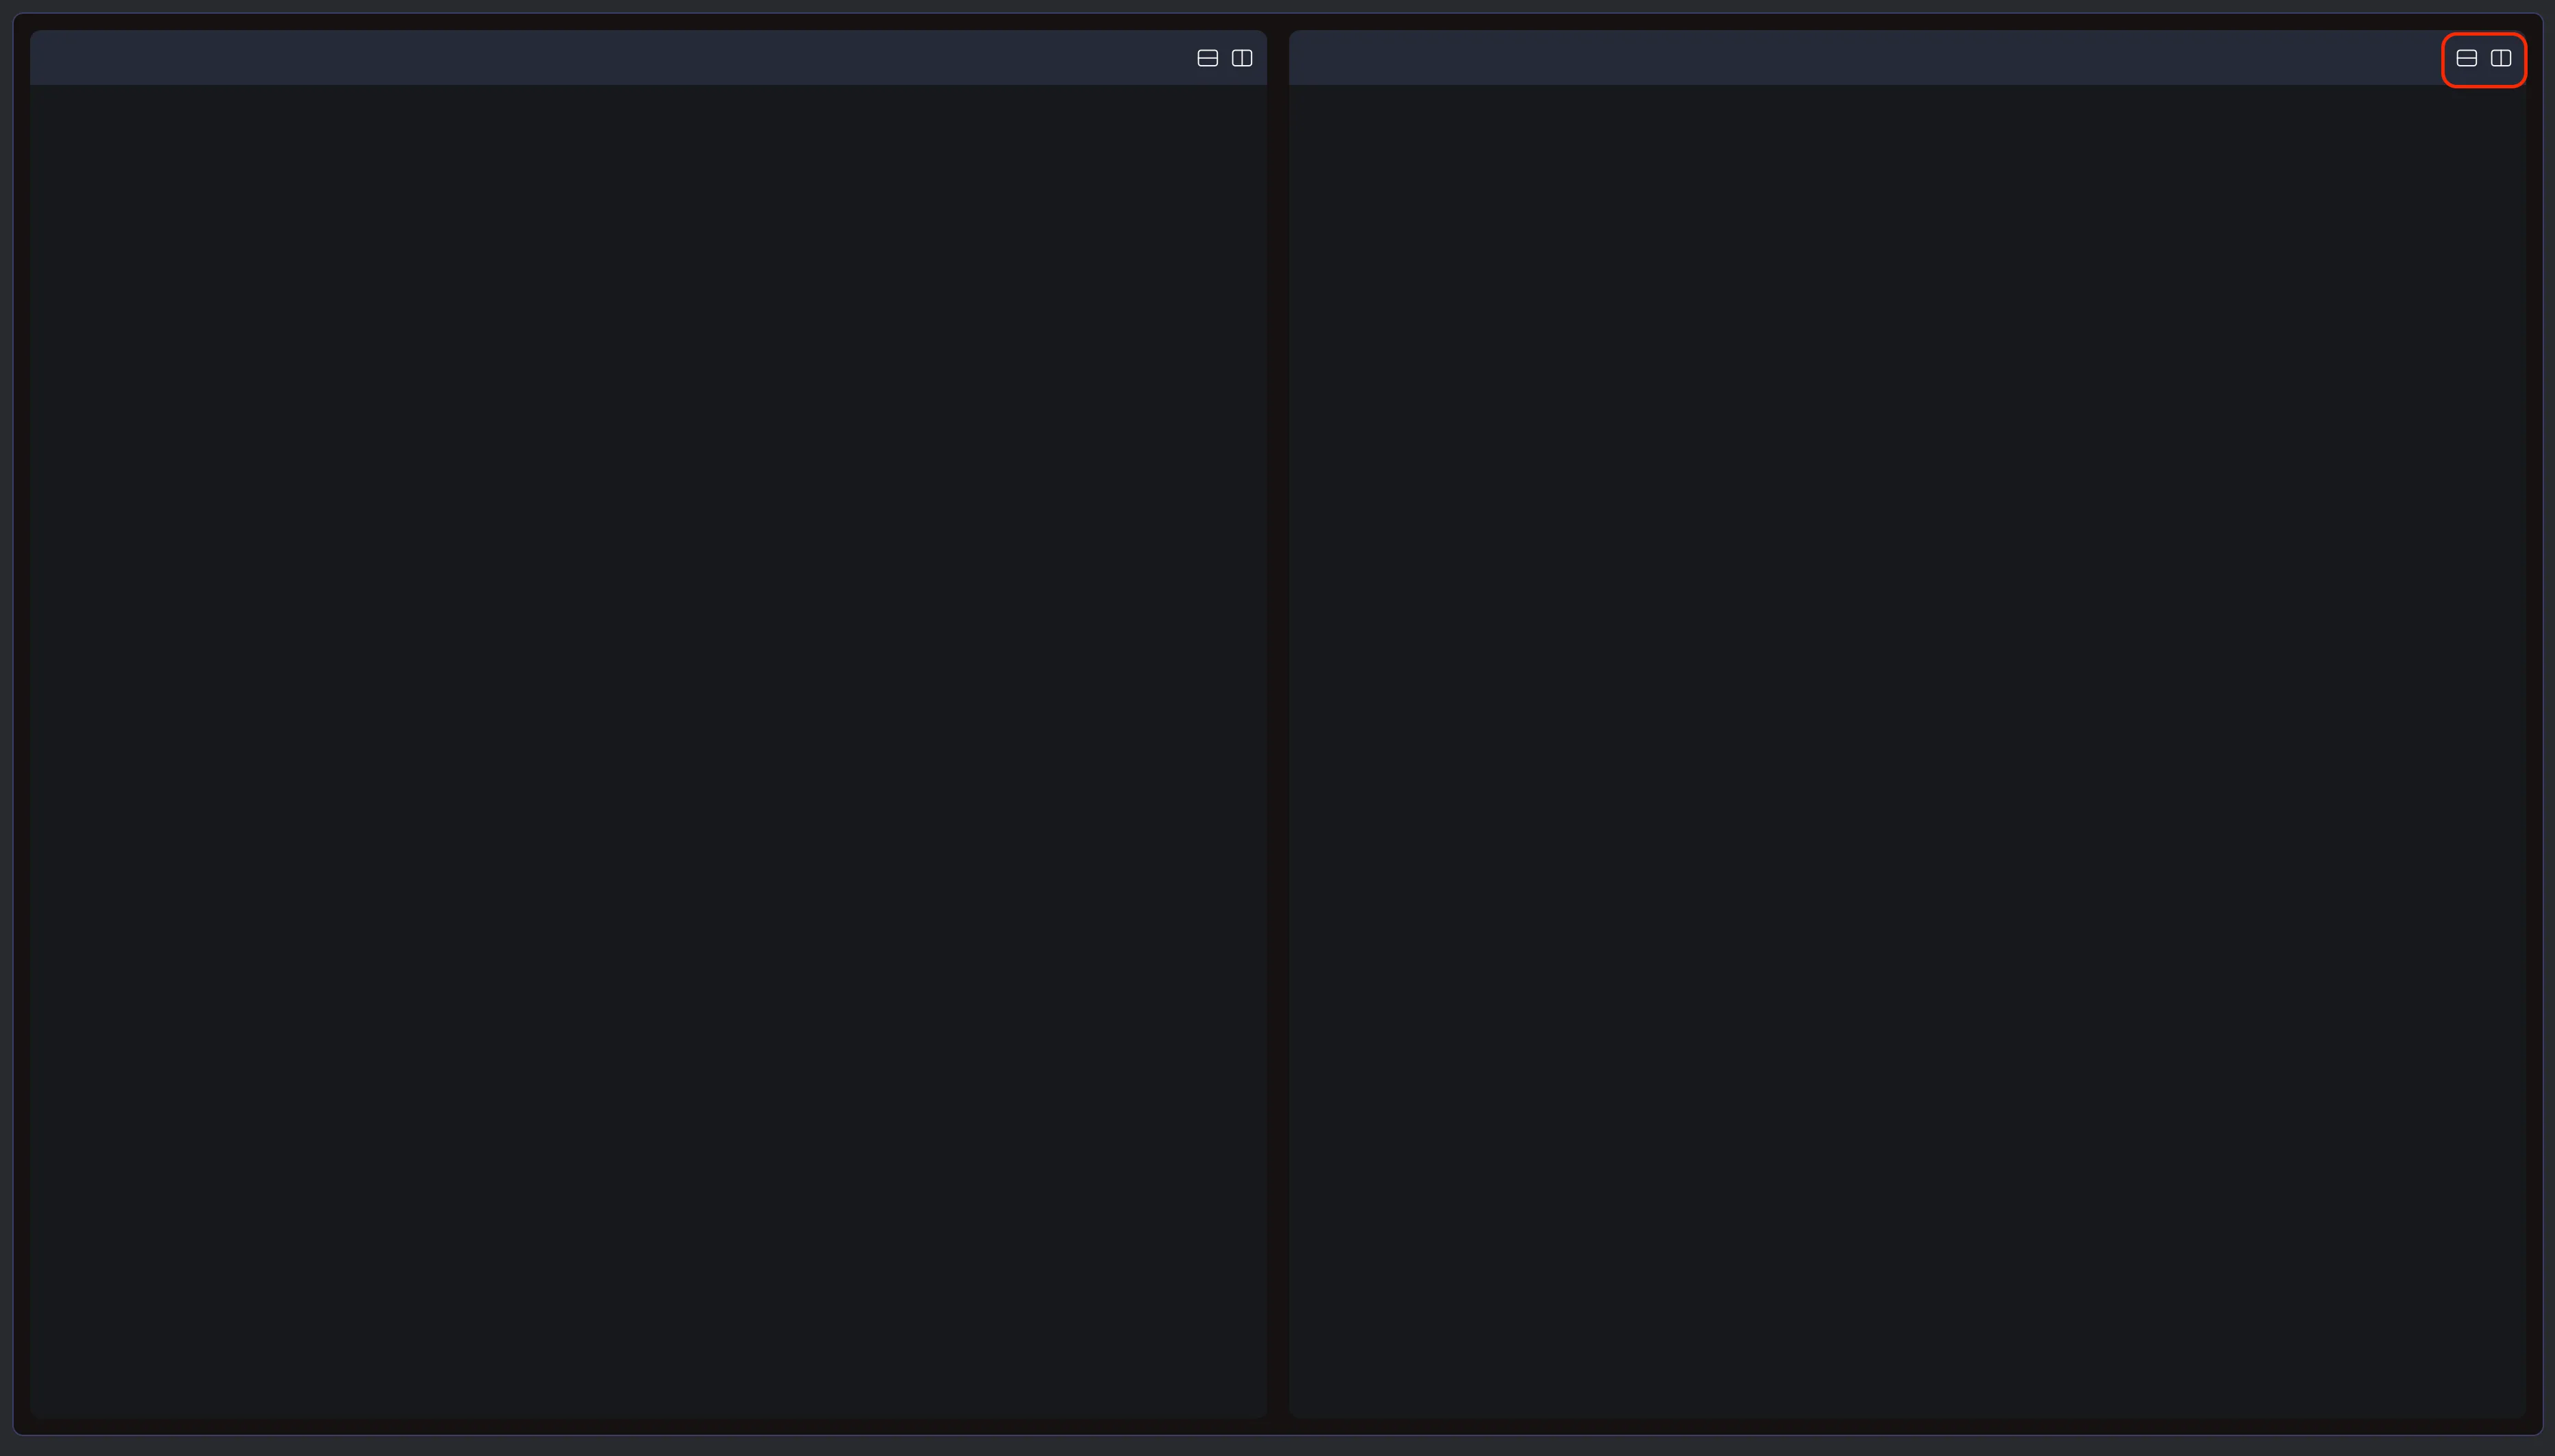
Section titled “Adding and merging panels”The default layout comes with a single large panel, giving you a clear starting point. You can then split it into multiple panels using the buttons in the top-right corner of the panel you want to split:
- Split horizontally (side by side)
- Split vertically (stacked)
You can split panels up to 3 levels deep. For example, you could split a column into rows, and then split one of those rows into columns again. Once the maximum depth is reached, the split buttons will no longer appear.
To merge a panel, simply drag its header into another panel. The panel you dragged will be closed, and the space will be reallocated automatically. Any tabs on that panel will also be merged into the target panel.

Resizing panels
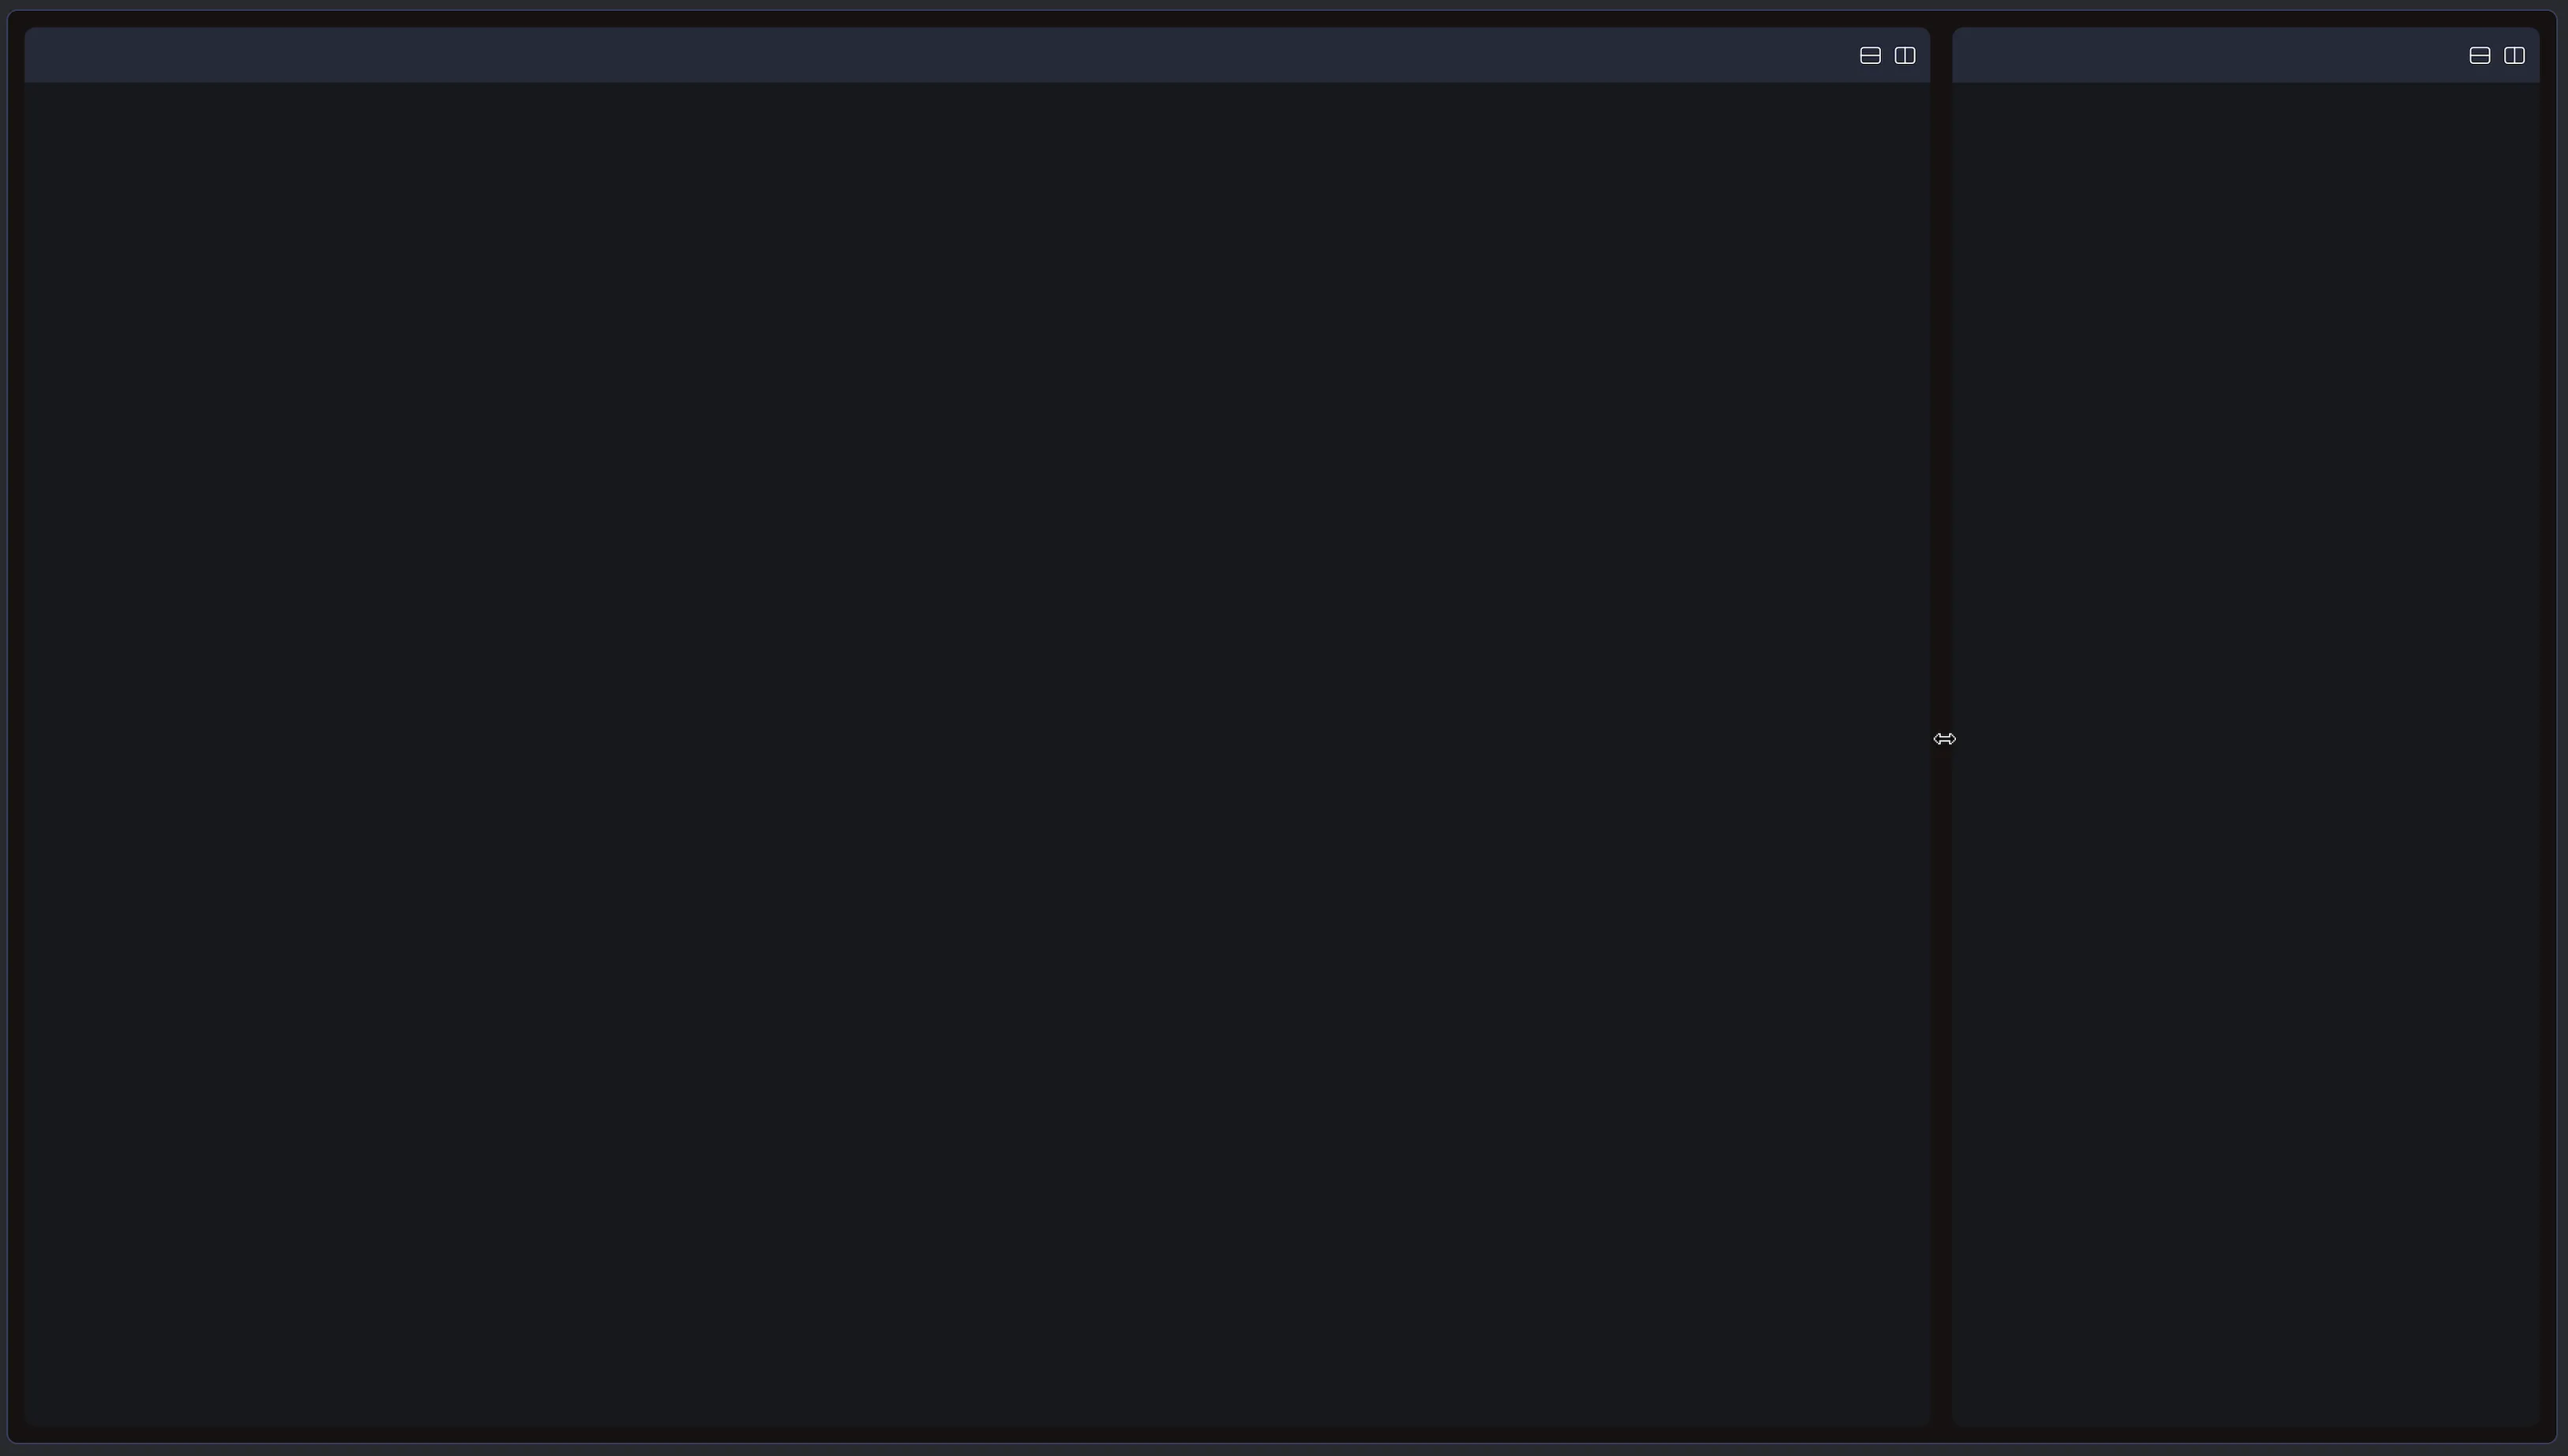
Section titled “Resizing panels”You can resize panels to give more space to one side and less to the other. For example, you might set up a large editor on the top-right for coding, keep a smaller terminal on the bottom-right for quick commands, and place the instructions on the left for easy reference.
To resize, hover over the border between two panels until the resize cursor appears, then click and drag to adjust the size.
Changing the default Layout
Section titled “Changing the default Layout”Each lab must have one default layout. This layout is applied automatically to any chapter or page that does not have one specifically assigned.
You can change the default layout in either of the following ways:
- Open the layout you want to set as the new default, then toggle “Use as default” in the top-right corner.
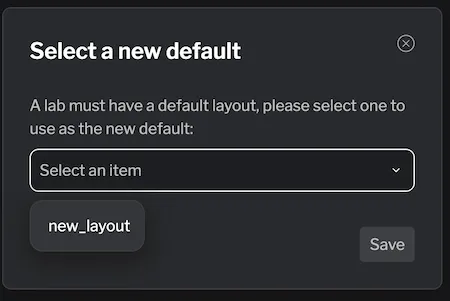
- Open the current default layout and untoggle “Use as default.” You’ll then be prompted to select a new default layout.
Adding tabs to a layout
Section titled “Adding tabs to a layout”Panels are empty by default. To make them useful, you need to add tabs (such as a terminal, code editor, web app, notes, or instructions). Tabs provide the actual tools and content you’ll work with inside the layout.
These are the types of tabs you can add:
- Instructions (you need at least one page to use this tab).
- Tabs created in the Tabs area. Types include: Service/Web Application, Terminal, Code Editor, Web Browser, Notes/Documents.
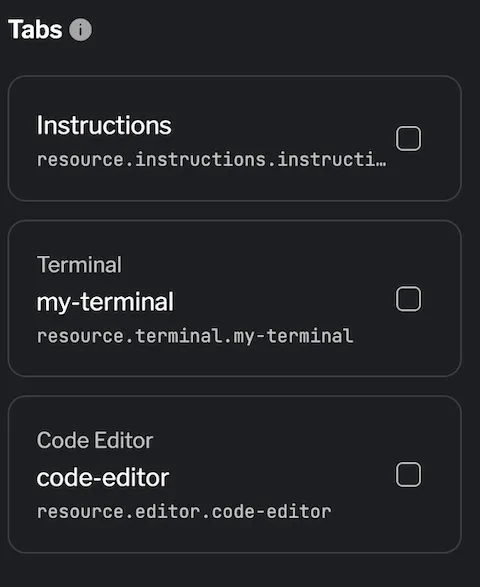
Assuming you already have tabs created, you can add them to your layout from the right sidebar. Simply check the list of available tabs on the right sidebar and check the box next to the tab you want to add.
For details on creating tabs, see the Tabs documentation.
Once a tab has been added, it appears in the panel that currently has focus. From there, you can arrange your layout to suit your needs. Simply click and drag a tab’s header to move it to another panel, allowing you to organize related tools together. This flexibility makes it easy to customize your layout for any workflow.
Renaming tabs
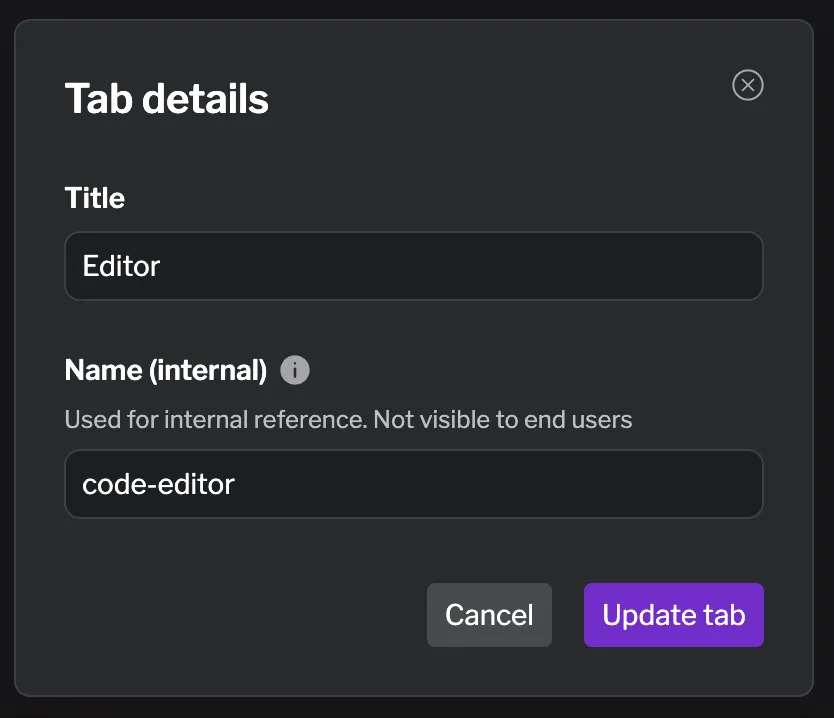
Section titled “Renaming tabs”When tabs are added, they appear with the name you gave the resource when creating it. You can override both the internal name and the title to make them more descriptive or user-friendly. Click the pencil icon next to a tab’s name to edit it.
- Title: Appears in the tab header.
- Name: Used for internal reference, for example if you need to programmatically refer to the tab.
Removing tabs
Section titled “Removing tabs”To remove a tab from a layout, simply uncheck it in the right sidebar. This removes the tab from the current layout but does not delete it from your lab. Alternatively, you can remove a tab by clicking the x button on its header.
Assigning layouts to content
Section titled “Assigning layouts to content”As mentioned earlier, each lab has a default layout, which is used whenever a chapter or page does not specify its own layout. However, you can assign specific layouts to individual chapters or pages to customize the user experience.
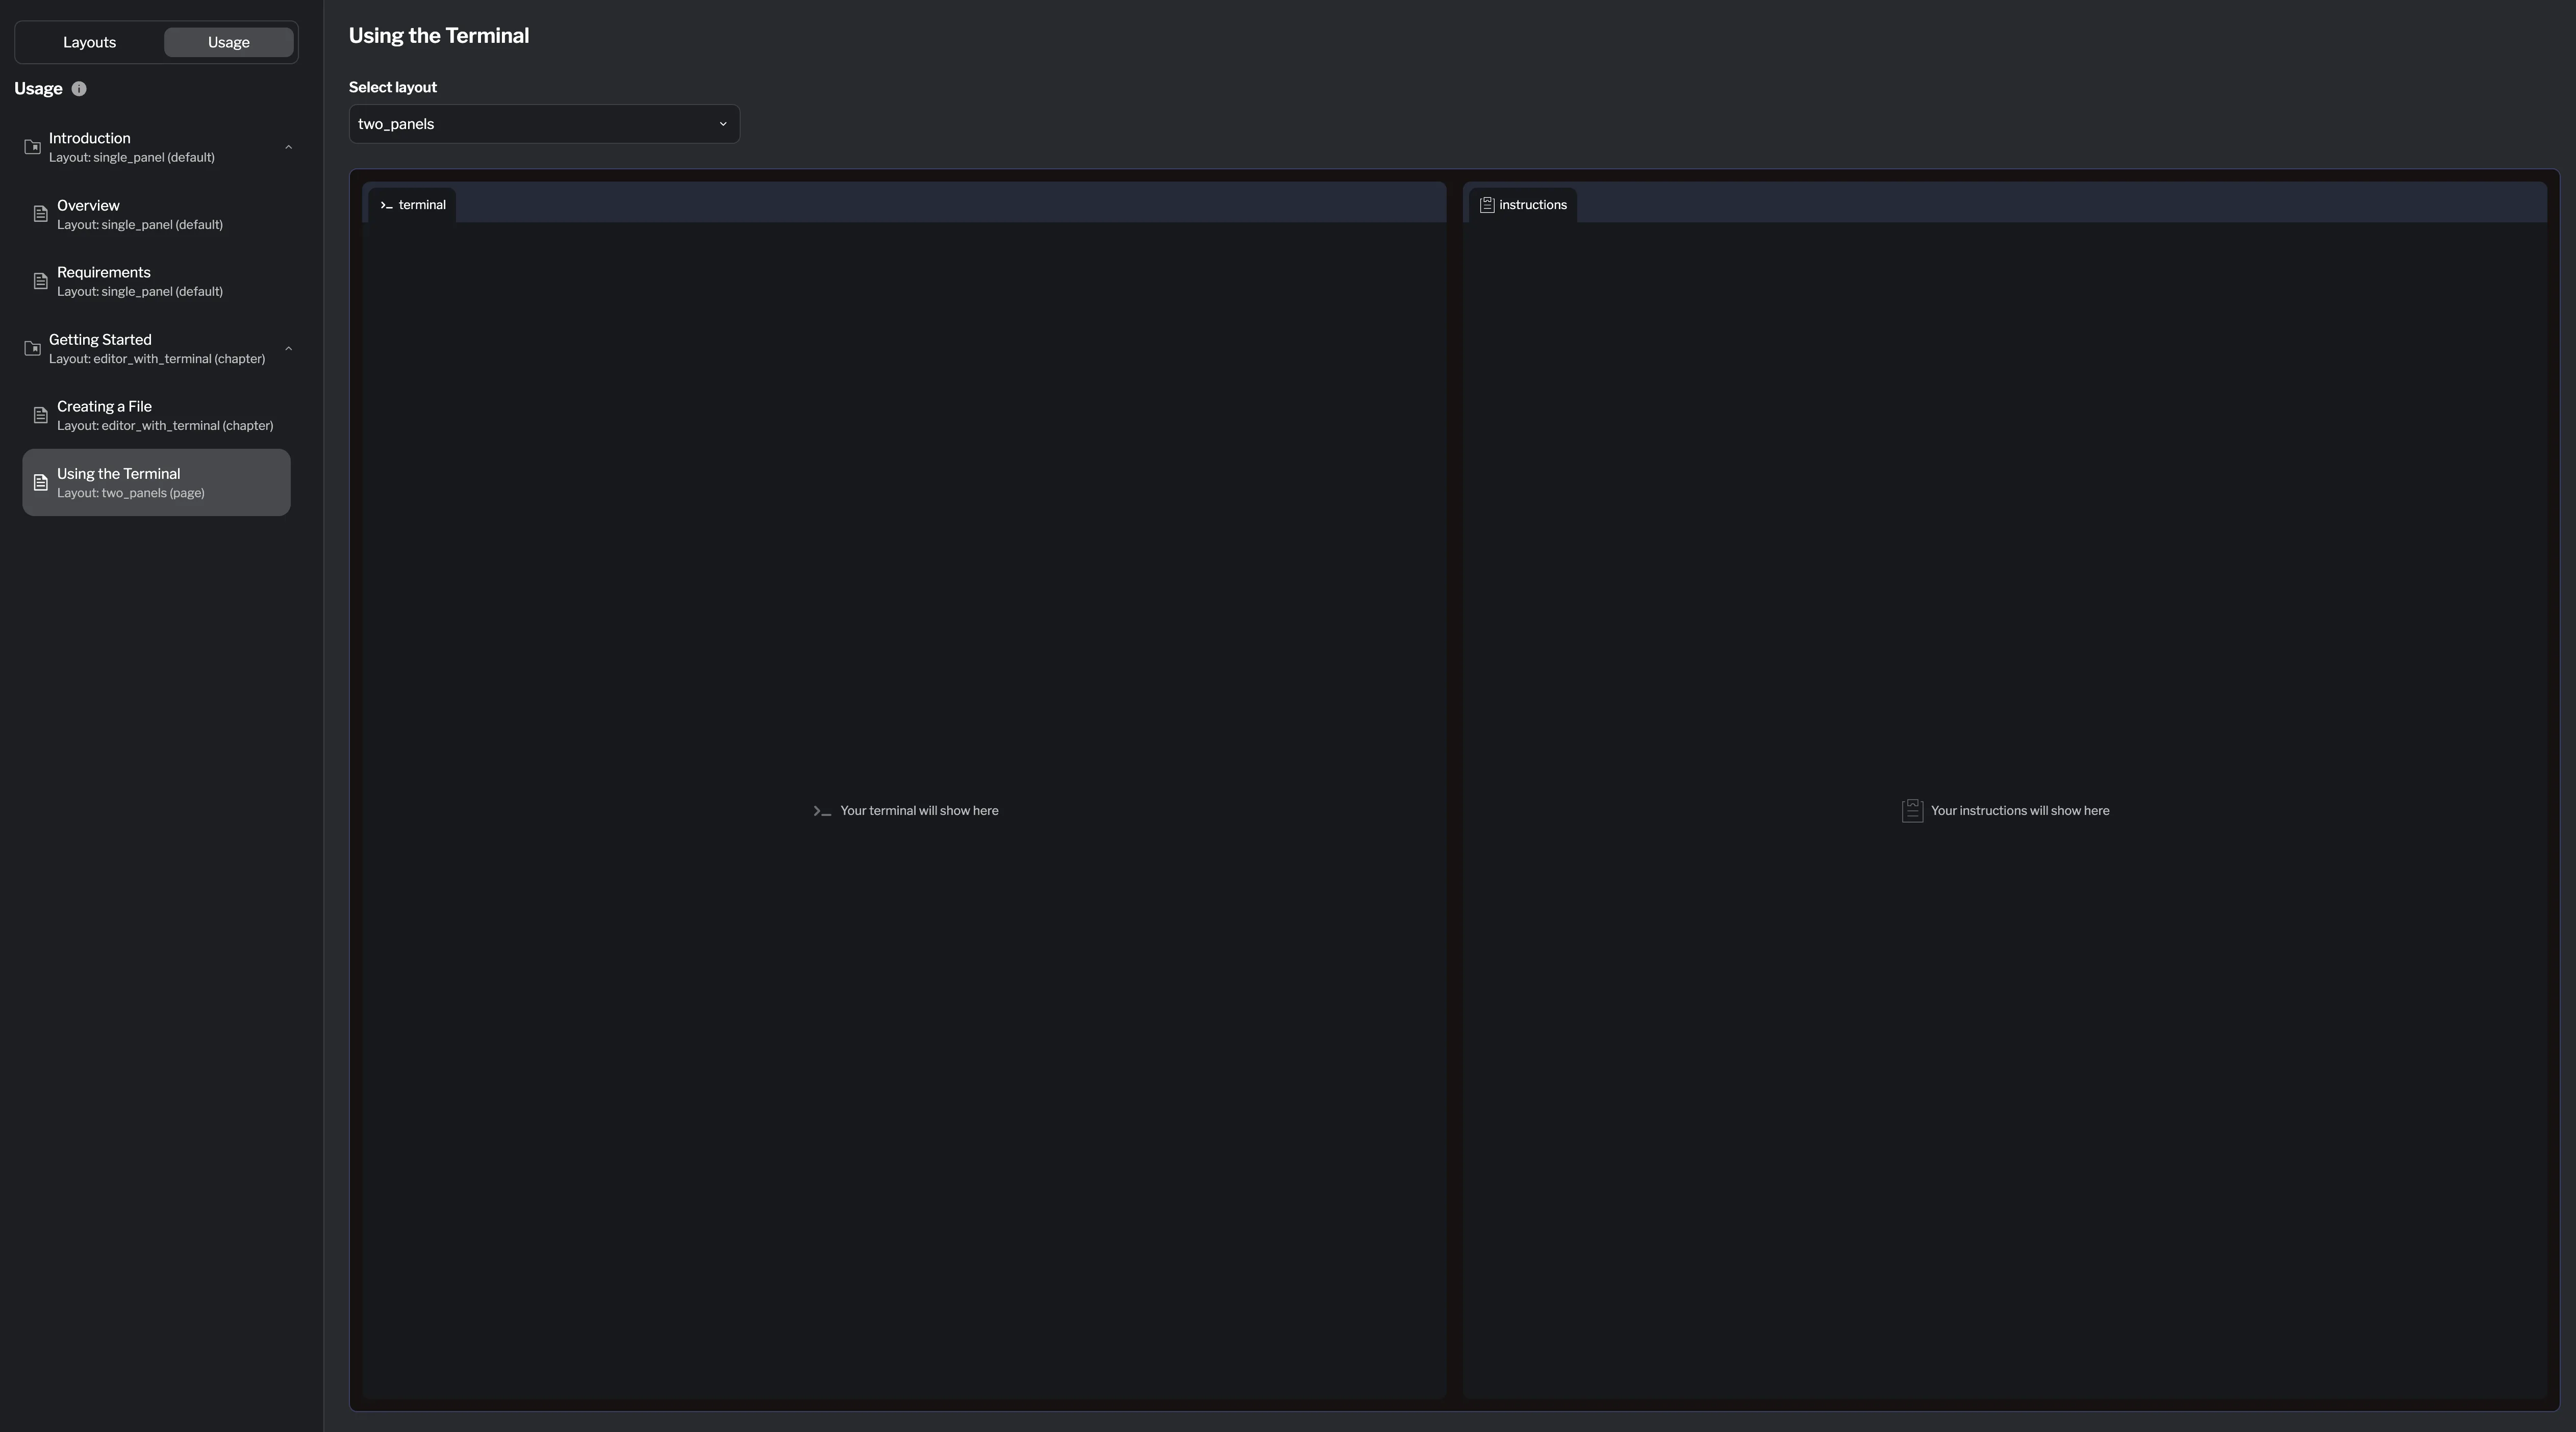
In the left sidebar, open the Usage tab to view a list of chapters and pages in your lab. Here, you can see which layout each item is currently using and change it if needed.
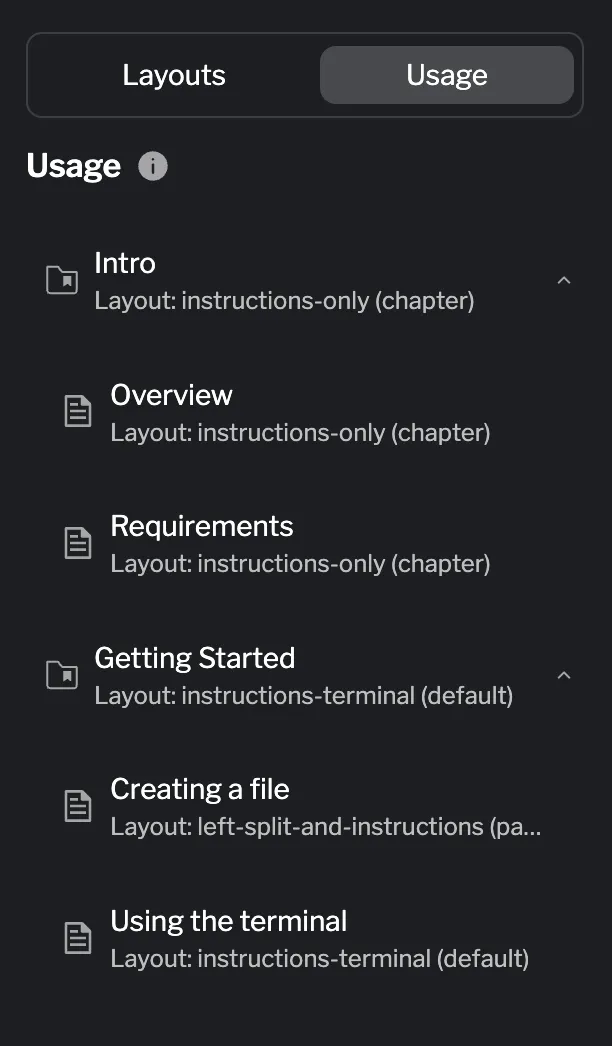
Layouts use inheritance, meaning that if a chapter is assigned a specific layout, all its pages will automatically inherit that layout unless a page explicitly specifies a different one. This ensures consistency across related content while still allowing individual pages to have unique layouts. If no layout is assigned, the lab default is applied.
Examples
Section titled “Examples”-
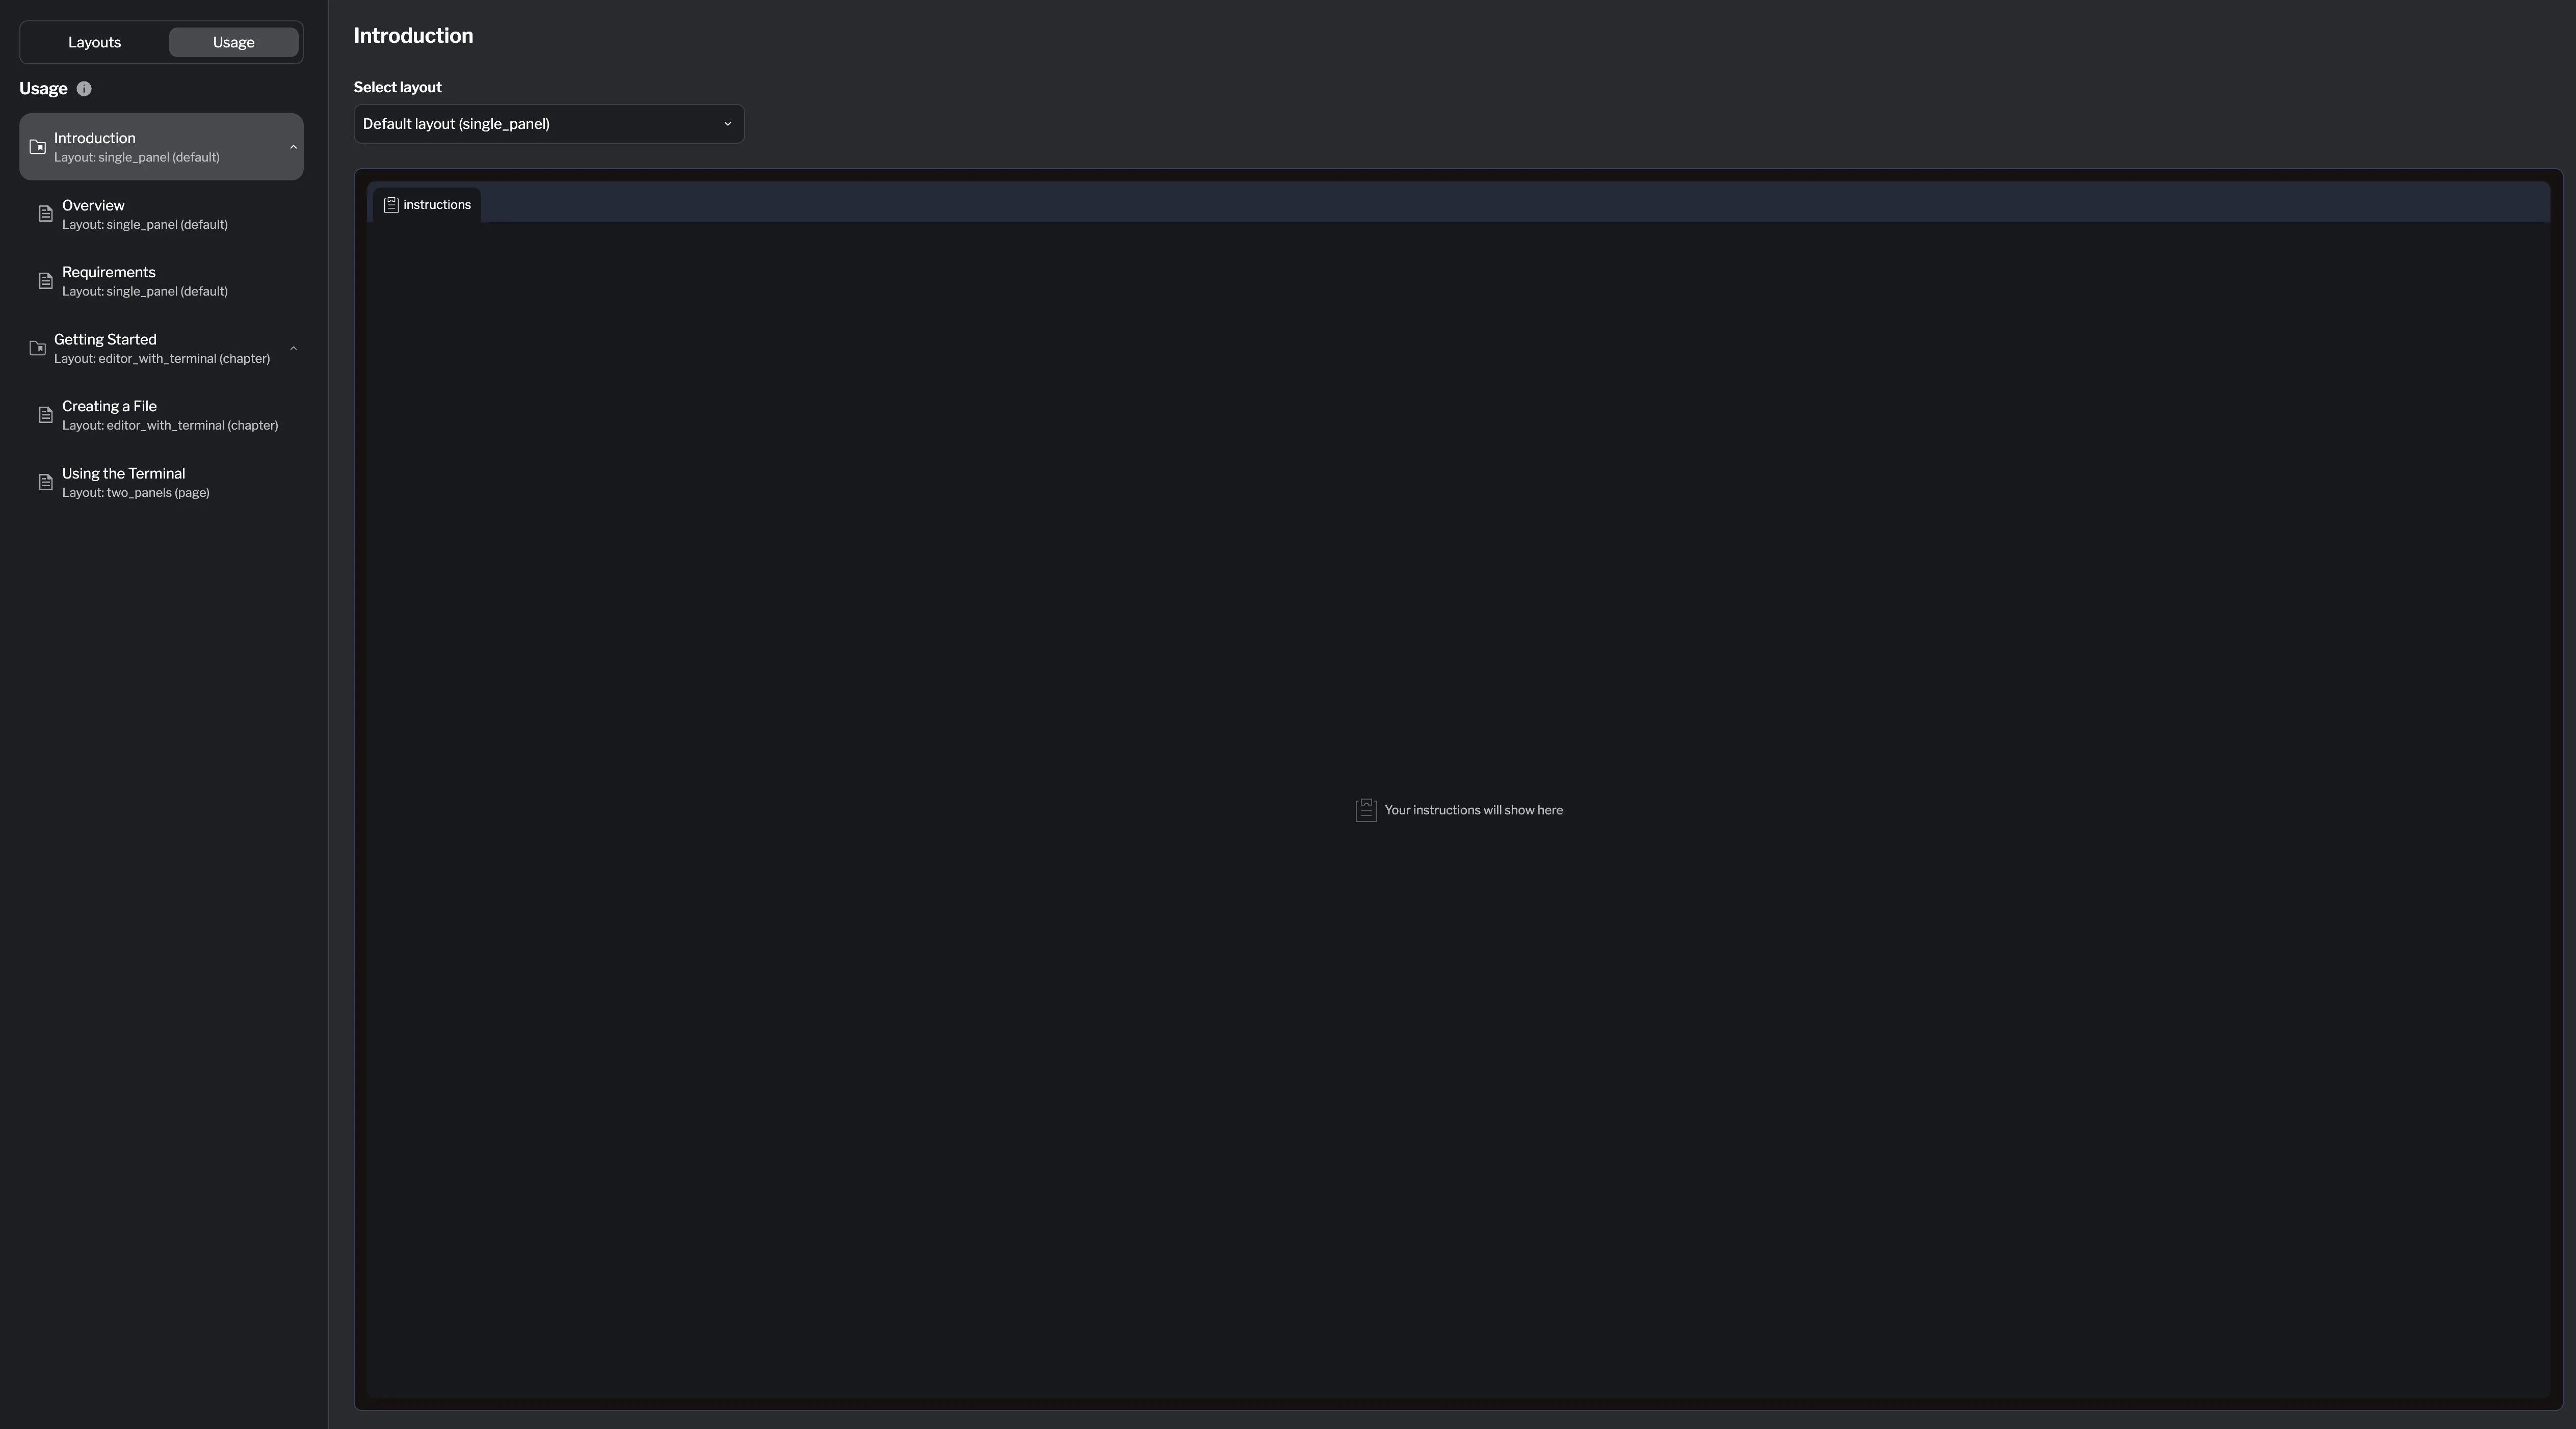
Lab default: The Introduction chapter has two pages, Overview and Requirements. Both use a single panel with just the Instructions tab. Since this matches the lab default, no additional configuration is needed.
-
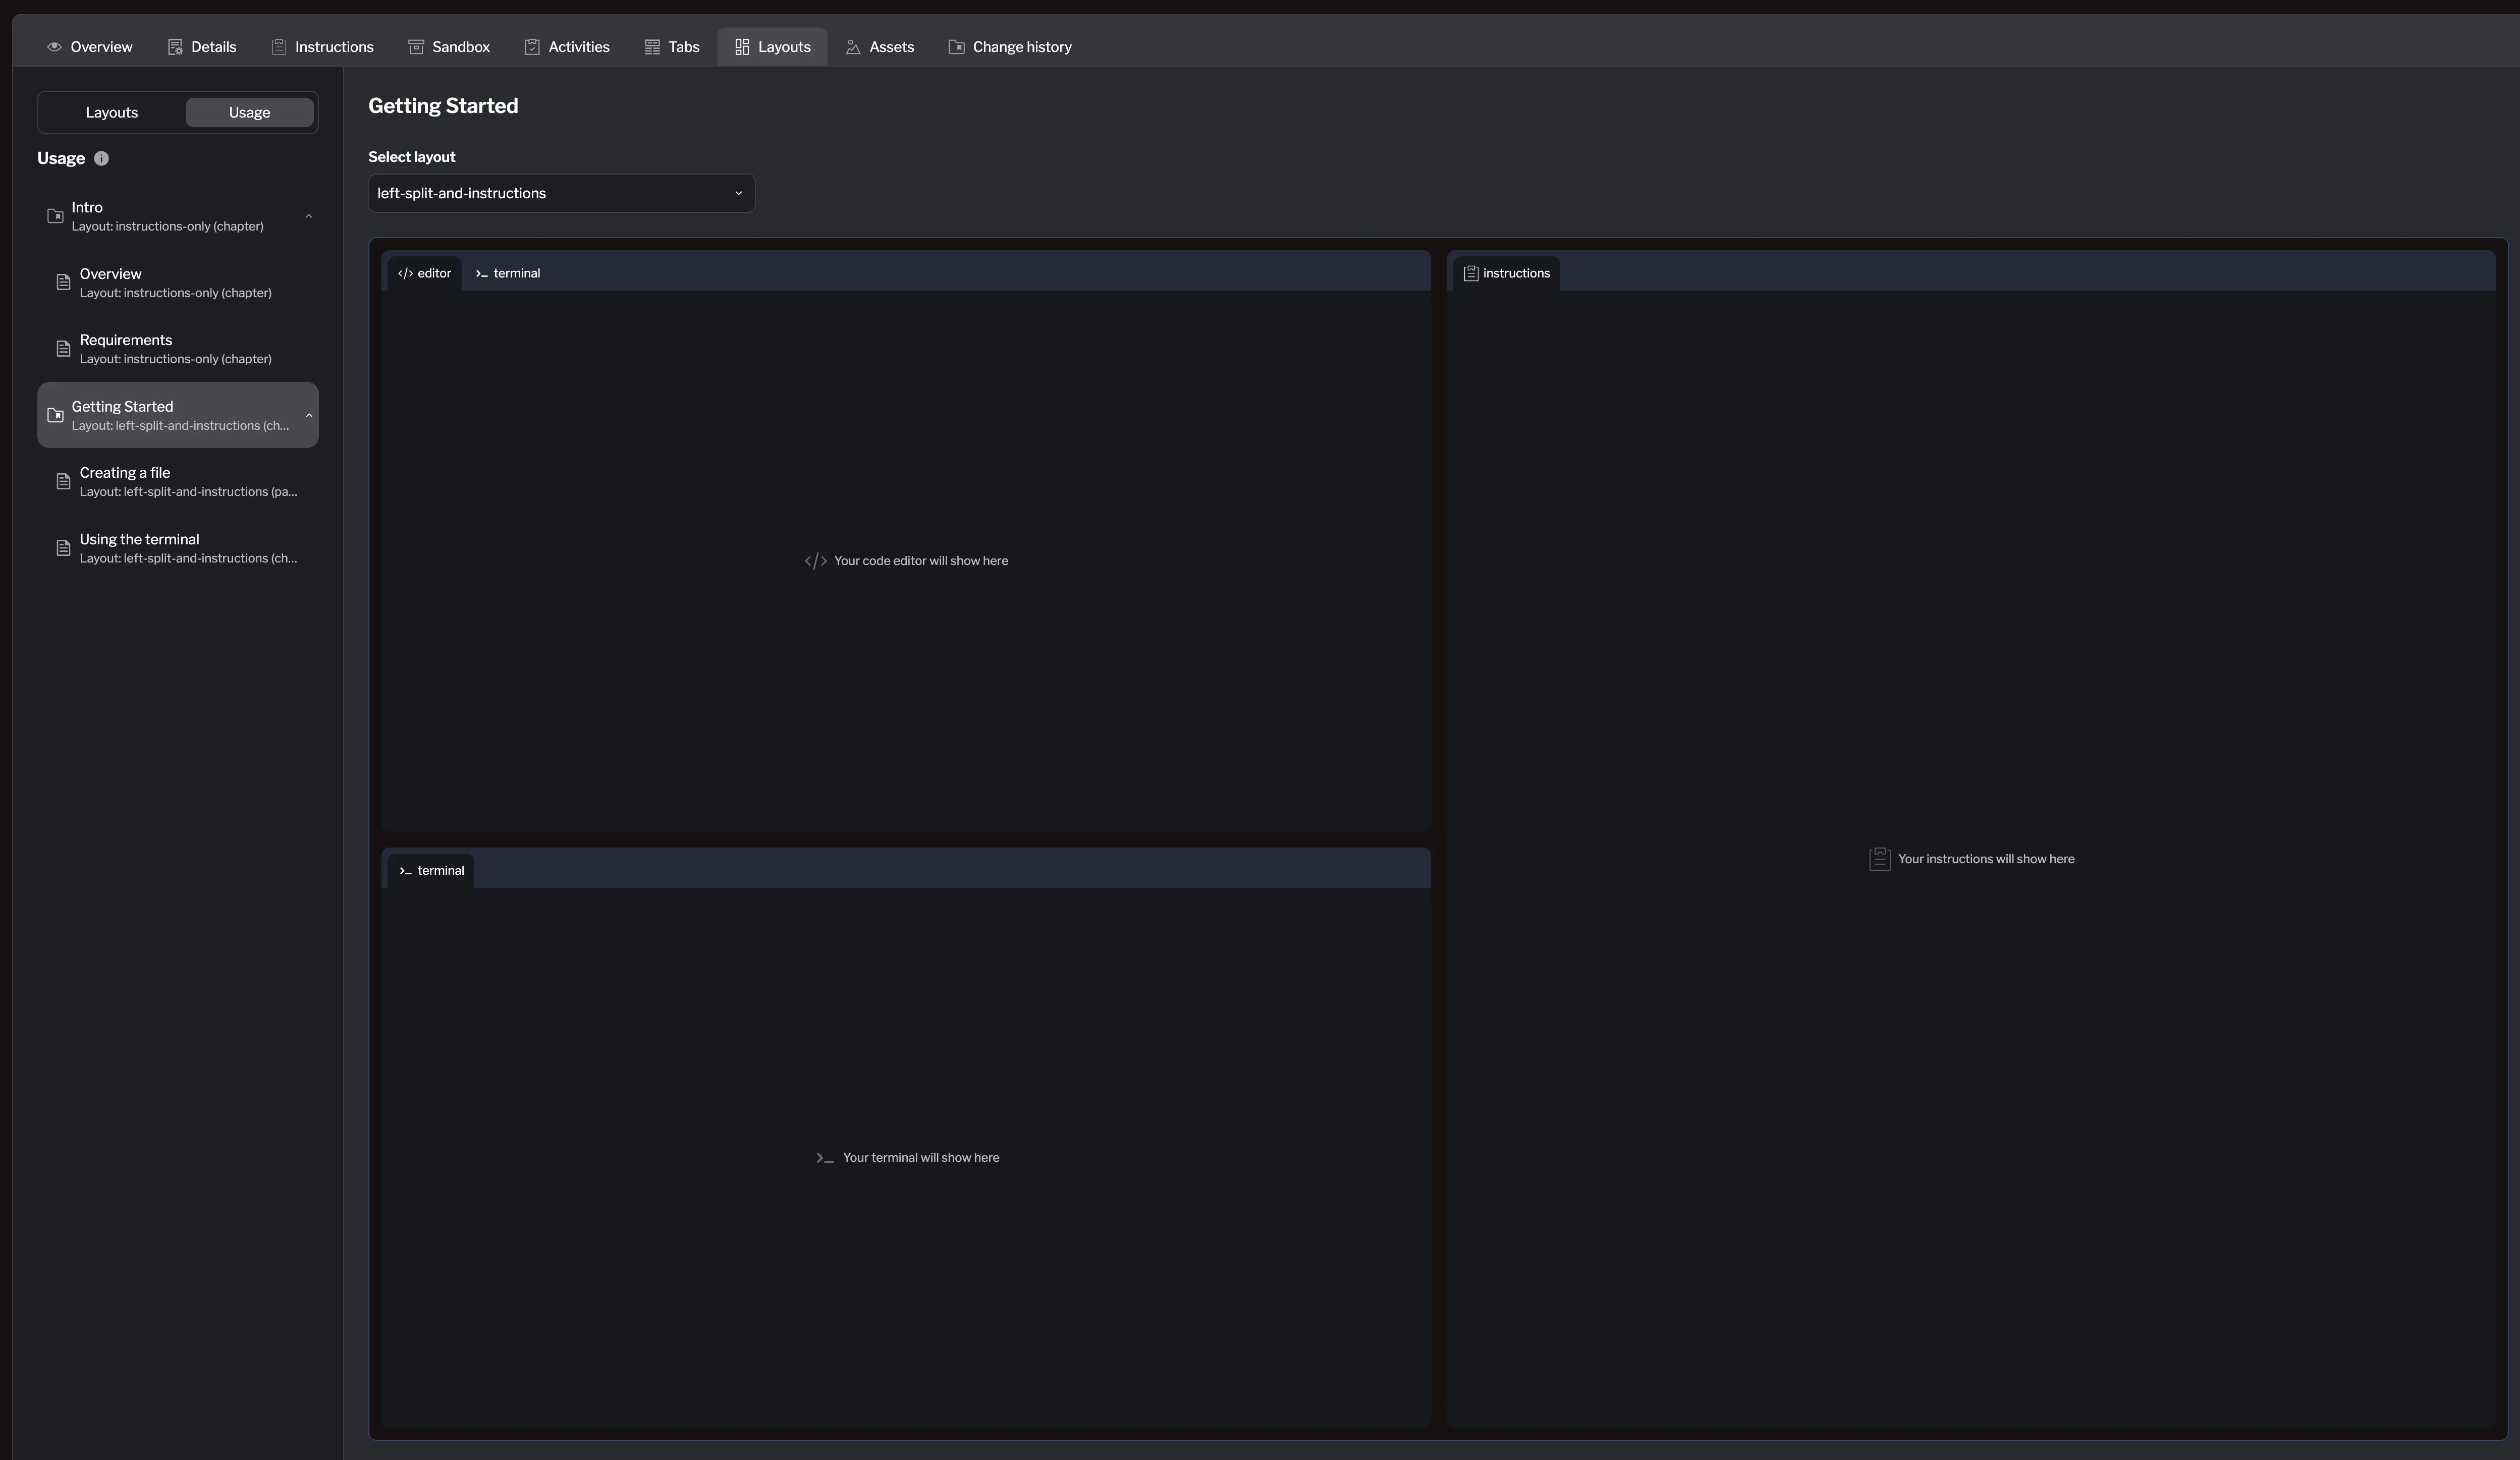
Chapter-level override: The Getting Started chapter uses a more complex layout with Instructions on the right, a Terminal on the bottom-left, and a Code Editor on the top-left. By setting this layout at the chapter level, all pages in the chapter inherit it.
-
Page-level override: For the Using a Terminal page, we override the chapter layout with a simpler two-panel layout that includes only Instructions and a Terminal.
Summary
Section titled “Summary”Layouts control how your lab content and tools are arranged, allowing you to create a tailored layout for each chapter or page. Key points to remember:
- Every lab has a default layout that applies when no other layout is specified.
- Panels can be split, resized, and organized to fit your workflow.
- Tabs provide the content and tools inside panels—they can be added, renamed, moved, or removed as needed.
- Layouts can be assigned at the chapter or page level, with inheritance allowing consistent design across related content.
By mastering layouts, you can create intuitive, efficient environments that guide users through your lab content while keeping essential tools and instructions accessible.
For more details on creating and managing tabs, see the Tabs documentation.
