Container
A Container resource lets you create and configure Docker containers that make up your lab environment. Containers provide the compute layer of your sandbox, allowing you to run applications, services, and tools that participants will use during hands-on exercises.
Through the UI, you can define container settings such as the image, startup commands, exposed ports, and environment variables — all without needing to write configuration files. You can also connect containers to networks, manage how they interact within the lab, and make them accessible through terminal tabs for users to interact with directly.
Containers make it easy to design flexible, interactive environments that replicate real-world systems and support a wide range of lab scenarios.
Creating a Container resource
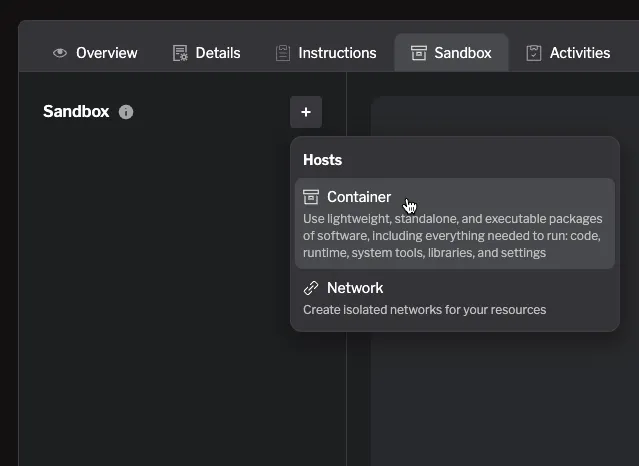
Section titled “Creating a Container resource”Container resources can be created in the Sandbox tab. To create a new Container resource, navigate to the Sandbox tab and click the + button. Select Container from the dropdown menu.

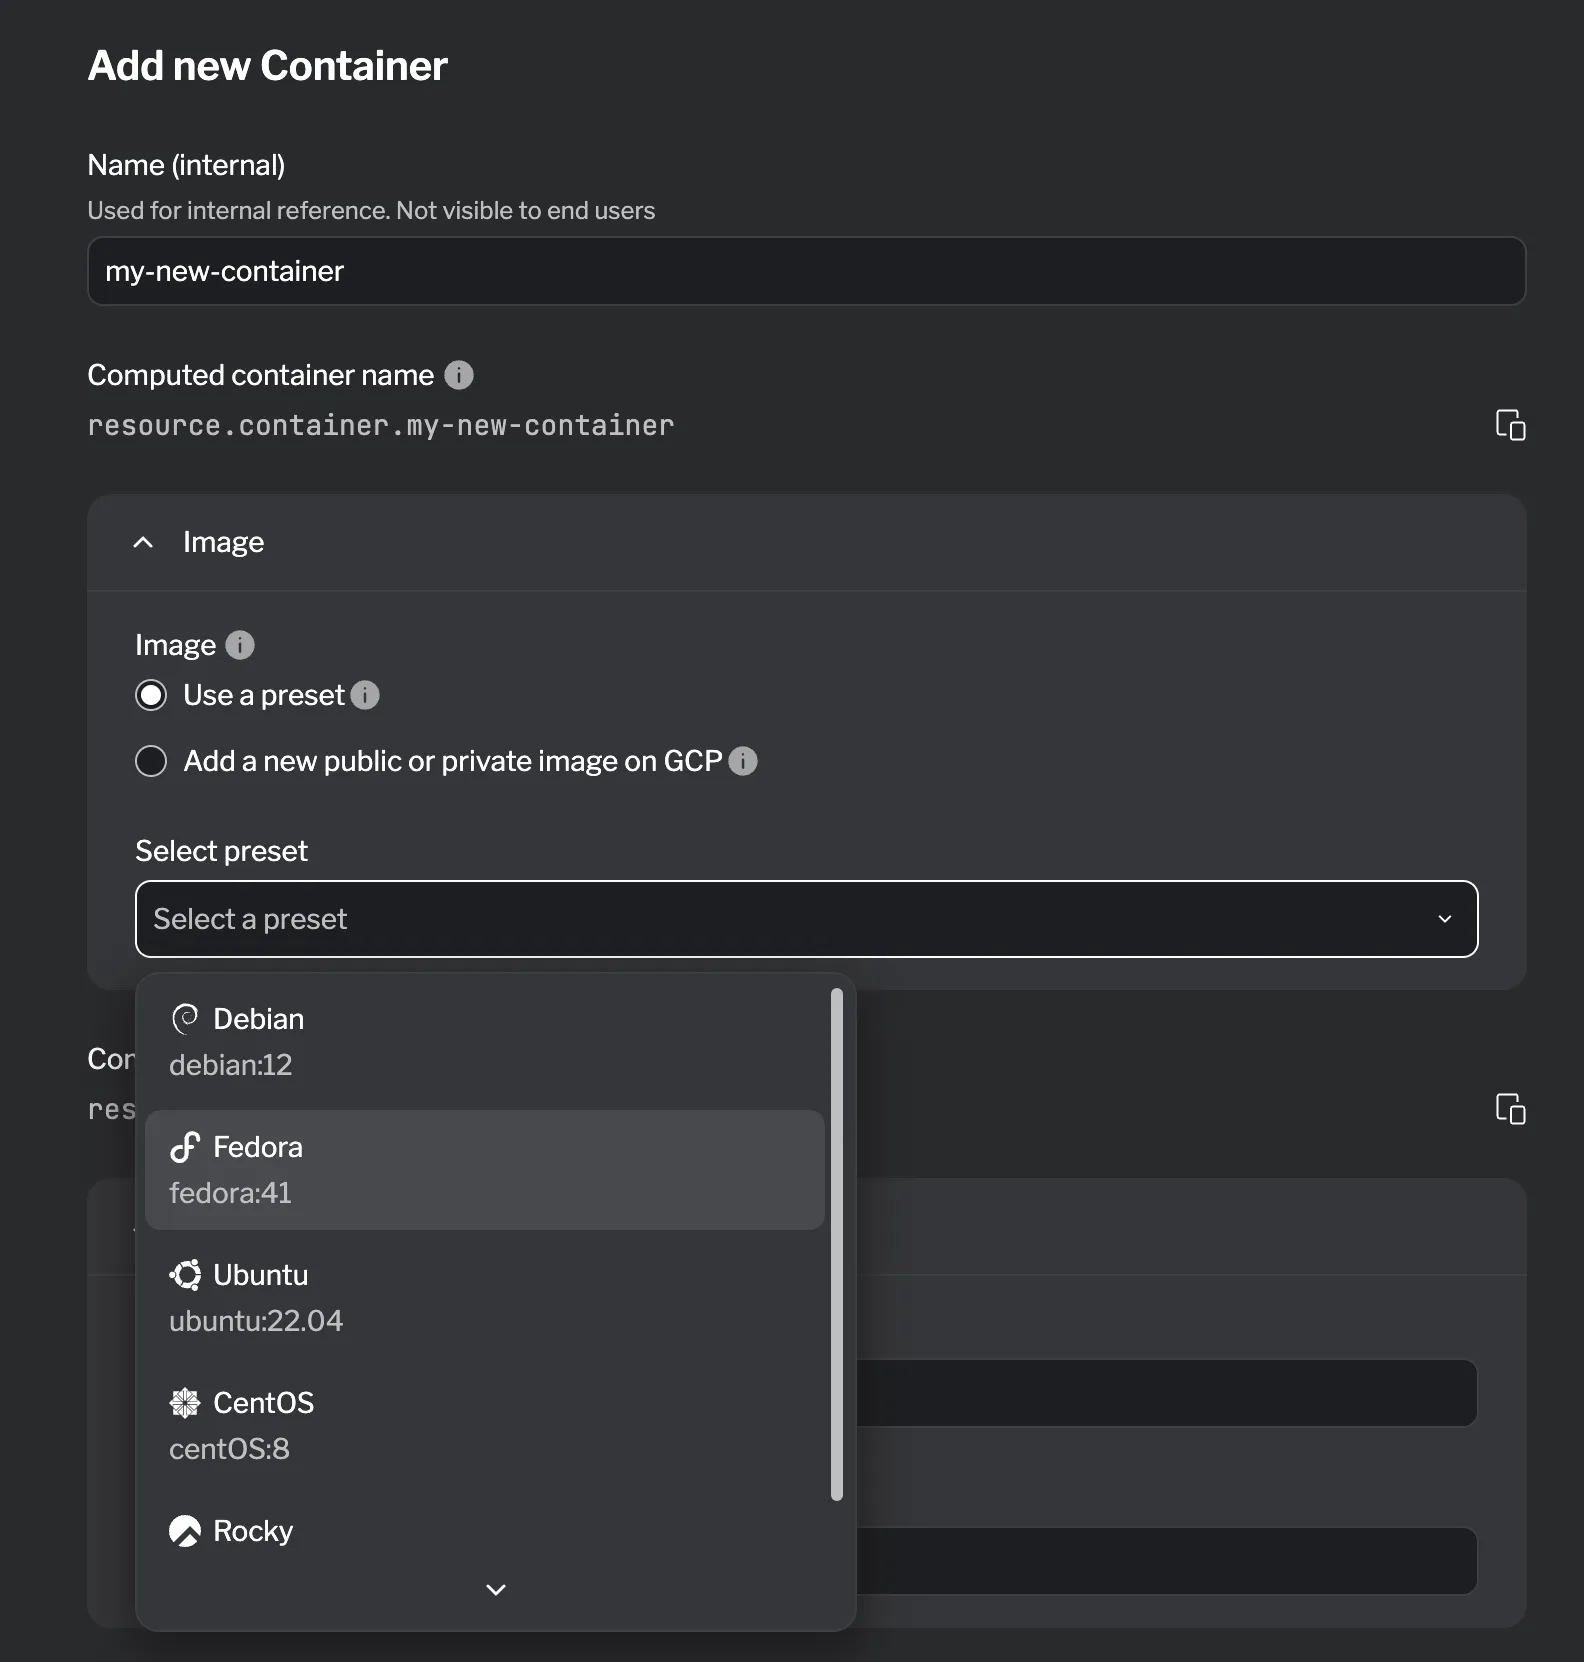
Start by naming the container. Note that this is an internal name. You can assign a variety of settings to your container, but you also have the option to use a preset. Presets are pre-configured images for common container setups that can help you get started quickly. You can choose a preset from the Select preset dropdown menu:

Alternatively, you can select your own public or private image. By selecting “Add a new public or private image on GCP” you can add a custom image in the input.
Editing a container resource
Section titled “Editing a container resource”To edit a container resource, you can select it from the list of existing sandboxes in the Sandbox tab. Click on the container you want to edit, make your changes in the configuration panel, and then click Add changes to save your updates.
Form sections
Section titled “Form sections”The container form is organized into collapsible sections. The Image and Resources sections are expanded by default. All other sections are collapsed and can be expanded by clicking on them.
1. Image (expanded by default)
Section titled “1. Image (expanded by default)”| Field | Required? | Default | Description |
|---|---|---|---|
| Image | ✓ | Docker image for the container |
2. Resources (expanded by default)
Section titled “2. Resources (expanded by default)”| Field | Required? | Default | Description |
|---|---|---|---|
| Memory | 256 | Memory limit in MB | |
| CPU | CPU limit | ||
| GPU Driver | GPU driver for the container | ||
| GPU Device IDs | GPU device IDs for the container | ||
| Privileged | Run the container in privileged mode |
3. Entrypoint & Command (collapsed)
Section titled “3. Entrypoint & Command (collapsed)”| Field | Required? | Default | Description |
|---|---|---|---|
| Entrypoint | Override the default entrypoint | ||
| Command | Command to run in the container |
4. Environment Variables (collapsed)
Section titled “4. Environment Variables (collapsed)”| Field | Required? | Default | Description |
|---|---|---|---|
| Environment Variables | Key-value pairs for environment variables |
5. Network (collapsed)
Section titled “5. Network (collapsed)”| Field | Required? | Default | Description |
|---|---|---|---|
| Network ID | ✓ | Select the network for the container | |
| IP Address | Static IP address for the container |
6. Ports (collapsed)
Section titled “6. Ports (collapsed)”| Field | Required? | Default | Description |
|---|---|---|---|
| Local | ✓ | Local port on the host machine | |
| Host | Port inside the container. If it is not set, the same value as Local will be used | ||
| Protocol | Default | Protocol type (TCP/UDP). Default is TCP |
7. Port Ranges (collapsed)
Section titled “7. Port Ranges (collapsed)”| Field | Required? | Default | Description |
|---|---|---|---|
| Range | ✓ | Range of ports on the host (e.g. 3000-3010) | |
| Enable host | false | Enable host port mapping | |
| Protocol | Default | Protocol type (TCP/UDP). Default is TCP |
8. Volumes (collapsed)
Section titled “8. Volumes (collapsed)”| Field | Required? | Default | Description |
|---|---|---|---|
| Source | ✓ | Source path on the host machine | |
| Destination | ✓ | Destination path inside the container | |
| Read Only | false | Mount the volume as read-only |
9. Health Checks (collapsed)
Section titled “9. Health Checks (collapsed)”| Field | Required? | Default | Description |
|---|---|---|---|
| Timeout | 30s | Health check timeout |
Health checks support three modes:
HTTP
| Field | Required? | Default | Description |
|---|---|---|---|
| Address | ✓ | Healthcheck URL | |
| Method | GET | HTTP method | |
| Body | Request body (hidden when method is GET) | ||
| Headers | HTTP headers | ||
| Success codes | 200 | Expected success codes |
TCP
| Field | Required? | Default | Description |
|---|---|---|---|
| Address | ✓ | Healthcheck address |
Exec
| Field | Required? | Default | Description |
|---|---|---|---|
| Command | Healthcheck command | ||
| Script | Healthcheck script | ||
| Exit code | 0 | Expected exit code |
10. Capabilities (collapsed)
Section titled “10. Capabilities (collapsed)”| Field | Required? | Default | Description |
|---|---|---|---|
| Add | Add capabilities to the container | ||
| Drop | Drop capabilities from the container |
Summary
Section titled “Summary”The Container resource serves as the core compute component of your sandbox, enabling you to run the applications, services, and tools used in hands-on labs. You can easily create and configure containers through the UI by choosing a preset image or defining your own, setting startup commands, ports, and environment variables — all without writing configuration files.
For more granular control, containers can also be fine-tuned using advanced configuration options such as volumes, health checks, networks, and resource limits.
Overall, container resources make it simple to build flexible, interactive environments that closely replicate real-world systems and provide an engaging learning experience.
