Using the Markdown Editor
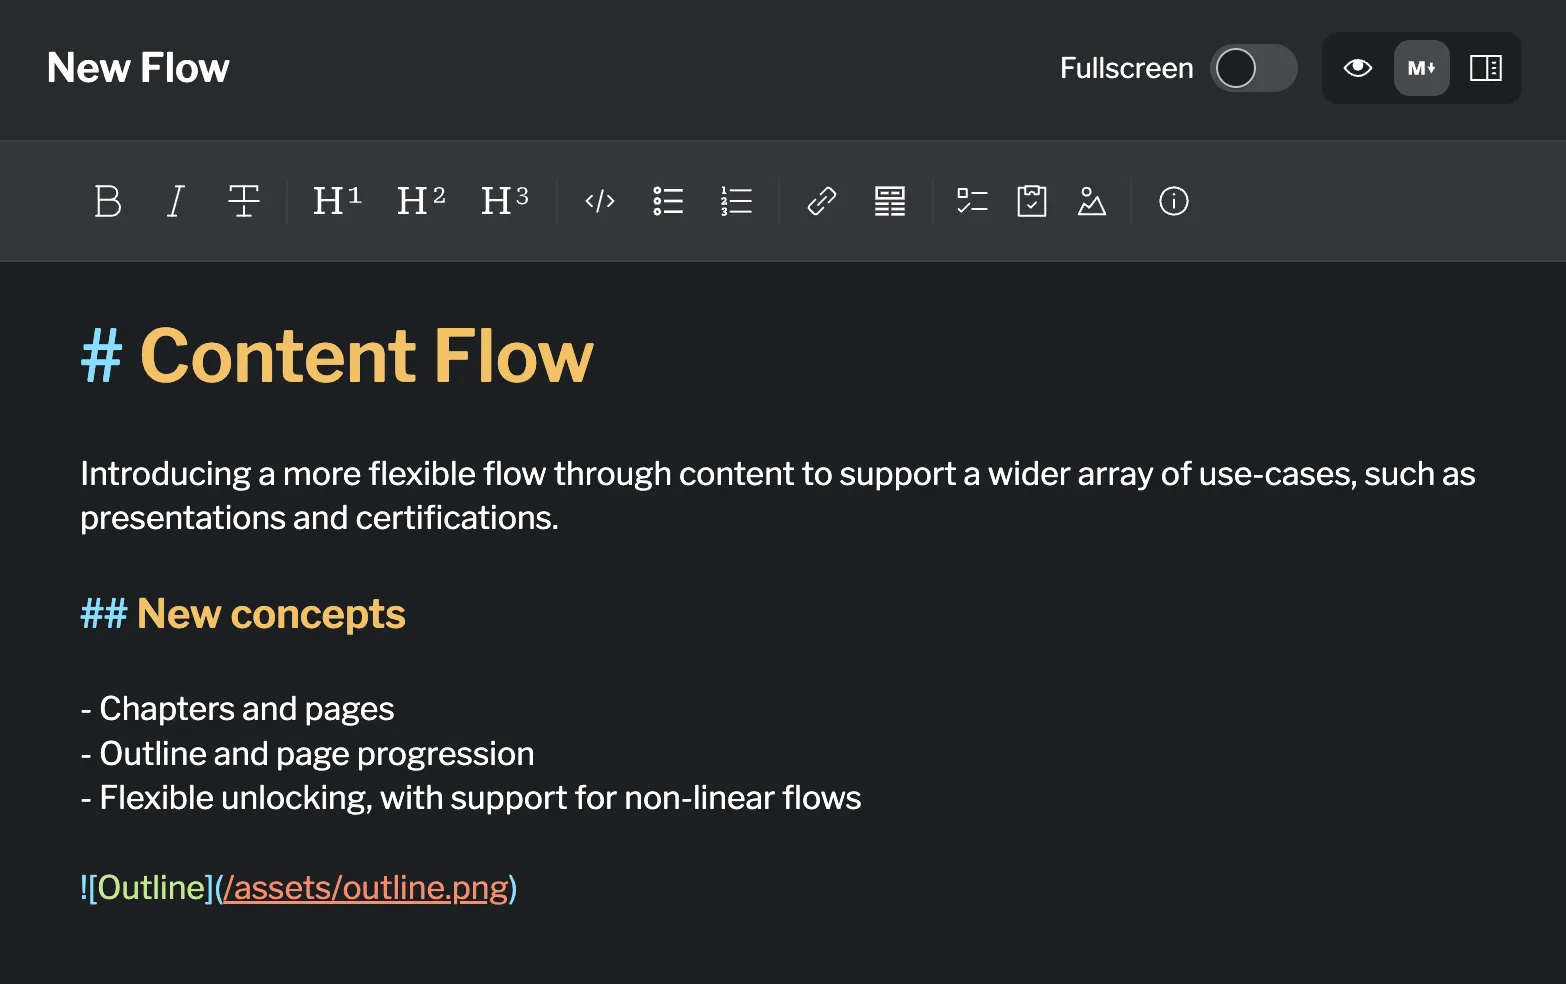
The markdown editor is where you write the instructional content that learners see in the Instructions panel. It provides a rich formatting toolbar, multiple view modes, and tools for embedding interactive activities.

Editor Interface
Section titled “Editor Interface”View Modes
Section titled “View Modes”Control how you see your content while editing using the view mode buttons in the top-right corner.

Available modes:
- Editor: Raw markdown editing with syntax highlighting
- Preview: See how content will appear to learners
- Side-by-side: Edit and preview simultaneously
The side-by-side mode is particularly useful for checking formatting as you write, ensuring your content looks exactly as you intend before saving.
Fullscreen Mode
Section titled “Fullscreen Mode”Click the fullscreen button to hide the outline sidebar and maximize your editing space. This is useful when working with long content or complex formatting.
Toolbar Features
Section titled “Toolbar Features”The toolbar provides quick access to formatting tools and content insertion options.
Text Formatting
Section titled “Text Formatting”| Button | Function | Result |
|---|---|---|
| B | Bold text | **bold** |
| I | Italic text | *italic* |
| Strikethrough | ~~struck~~ |
Headings
Section titled “Headings”| Button | Creates | Markdown |
|---|---|---|
| H1 | Level 1 heading | # Heading |
| H2 | Level 2 heading | ## Heading |
| H3 | Level 3 heading | ### Heading |
Use headings to structure your content hierarchically, with H1 for main topics, H2 for major sections, and H3 for subsections.
The Code button behavior depends on your selection:
- With text selected: Wraps the text in backticks for inline code formatting like
npm install - Without text selected: Inserts a code block component
<instruqt-code></instruqt-code>for multi-line code with syntax highlighting
- Unordered lists (ul): Bullet-point lists for unordered items
- Ordered lists (ol): Numbered lists for sequential steps
Example:
- Bullet list item- Another item
1. Numbered list2. Second itemInsert hyperlinks to external resources or internal cross-references. The link button opens a dialog for URL and display text.
Example:
[Link text](https://example.com)Tables
Section titled “Tables”Create formatted tables using the table insertion tool. Tables are useful for structured data, comparisons, or feature lists.
Example:
| Column 1 | Column 2 || -------- | -------- || Data 1 | Data 2 |Assets
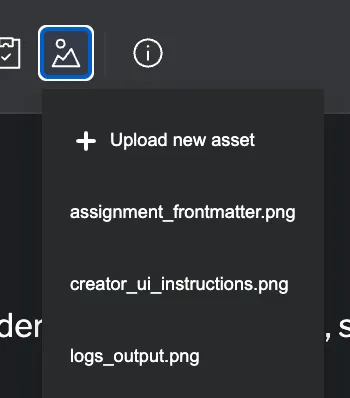
Section titled “Assets”The Assets button opens a picker showing all uploaded lab assets. Select any asset to insert appropriate markdown:

| Asset Type | Inserted As |
|---|---|
| Images (PNG, JPG, GIF) | Markdown image tag:  |
| PDFs | PDF viewer component: <instruqt-pdf> |
| Videos | Video player component: <instruqt-video> |
| Other files | Download link: <a href="path"> |
Click the ? button to open the Markdown Cheatsheet in a new tab. This external reference provides quick syntax reminders for markdown formatting.
Embedding Activities
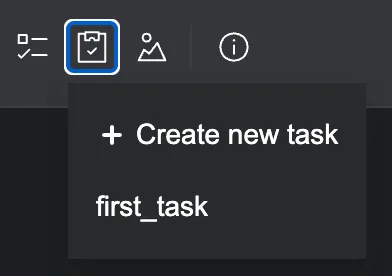
Section titled “Embedding Activities”Click the Tasks button to embed interactive task activities in your content.

The picker shows:
- Existing tasks: Select any previously created task to insert
- Create new task: Open the task creation drawer to build a new task
Once inserted, the task appears as a self-closing tag:
<instruqt-task id="task_id" />The task ID must match a task defined in your Activities section.
Quizzes
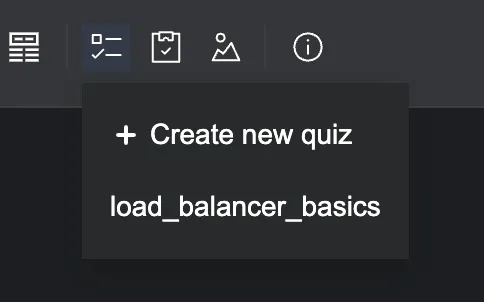
Section titled “Quizzes”Click the Quizzes button to embed quiz activities in your content.

The picker shows:
- Existing quizzes: Select any previously created quiz to insert
- Create new quiz: Open the quiz creation drawer to build a new quiz
Once inserted, the quiz appears as a self-closing tag:
<instruqt-quiz id="quiz_id" />The quiz ID must match a quiz defined in your Activities section. To learn more about activities, you can go to the Activities page.
Saving Changes
Section titled “Saving Changes”Content Changes vs. Structural Changes
Section titled “Content Changes vs. Structural Changes”The Instructions tab handles saves differently based on what you’re changing:
Content changes (require manual save):
- Editing page markdown content
- Modifying text, formatting, or embedded activities
When you make content changes, the Add changes button appears next to Discard.

Structural changes (saved immediately):
- Creating, renaming, or deleting chapters and pages
- Reordering chapters or pages
- Moving pages between chapters
These changes take effect immediately without requiring Add changes.
Best Practices
Section titled “Best Practices”- Clear Hierarchy: Use heading levels consistently (H1 for title, H2 for sections, H3 for subsections)
- Break Content Up: Use headings to create scannable sections rather than long blocks of text
- Preview Frequently: Switch to preview mode to see how learners will experience your content
- Activity Placement: Embed activities after relevant instructional content, not before
- Save Regularly: Use Add changes frequently to avoid losing work
- Descriptive Links: Use meaningful link text instead of “click here”
Summary
Section titled “Summary”The markdown editor provides powerful tools for creating engaging instructional content. Master the toolbar features, view modes, and save workflows to efficiently produce high-quality lab content.
Key points:
- Select a page before editing its content
- Three view modes: editor, preview, and side-by-side
- Toolbar provides formatting tools, asset insertion, and activity embedding
- Content changes require Add changes, structural changes save immediately
- Review changes interface provides selective discard with git-style diff
- Activities (tasks and quizzes) can be inserted from existing or created new via drawer
Related Documentation
Section titled “Related Documentation”- Managing Chapters & Pages: Learn about content organization
- Creating Activities: Build tasks and quizzes to embed
- Designing Layouts: Control how content appears to learners
